How to Create a Usage SKU
Usage-based pricing models are most common in SaaS platforms that automate some action or store some type of data and expect high volumes of them from their users. Examples are API requests to an external API, or metrics pings to store some type of high interval data.
Pre-reqs
This is only for a SKU’s pricing and not it’s billing. RevOps provides a Billing Frequency term to allow you to bill customers at a different interval than your pricing.
1. Create a new SKU
To create a Usage-based priced SKU, you need to start by:
- Go to Settings > SKUs.
- Click Create SKU.
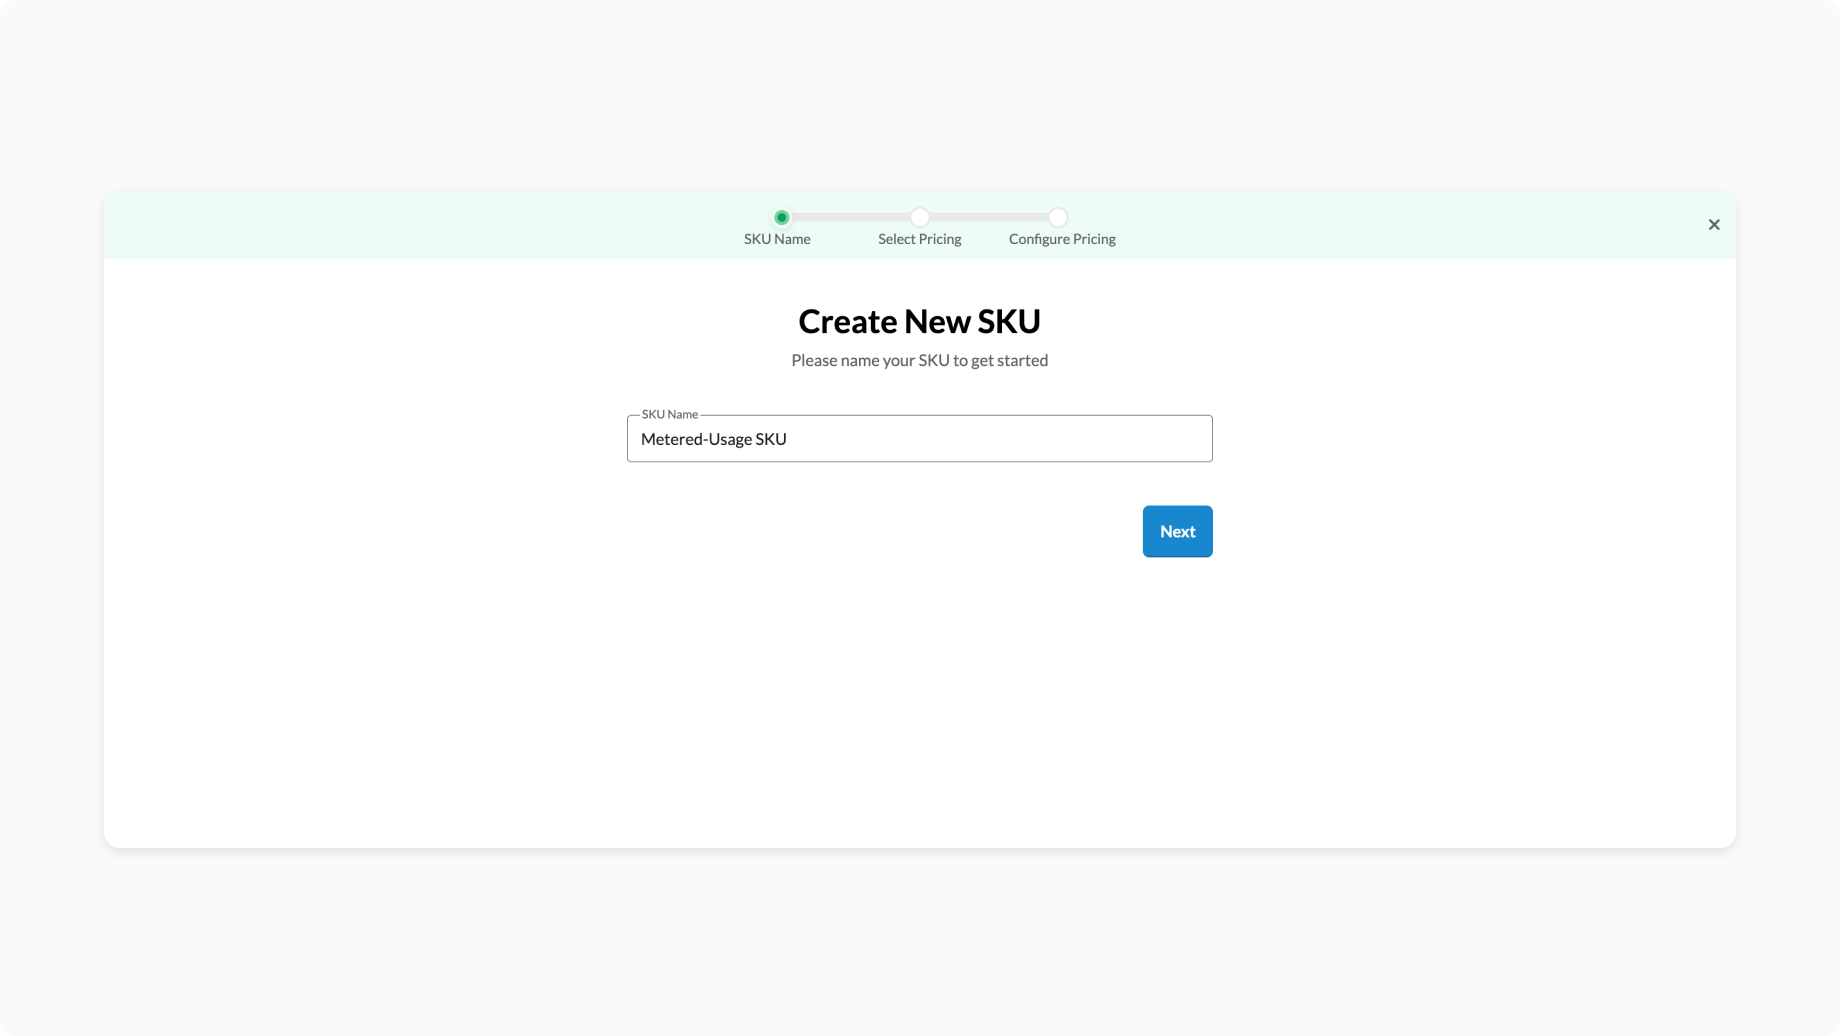
- In the SKU creation wizard first define a SKU name.
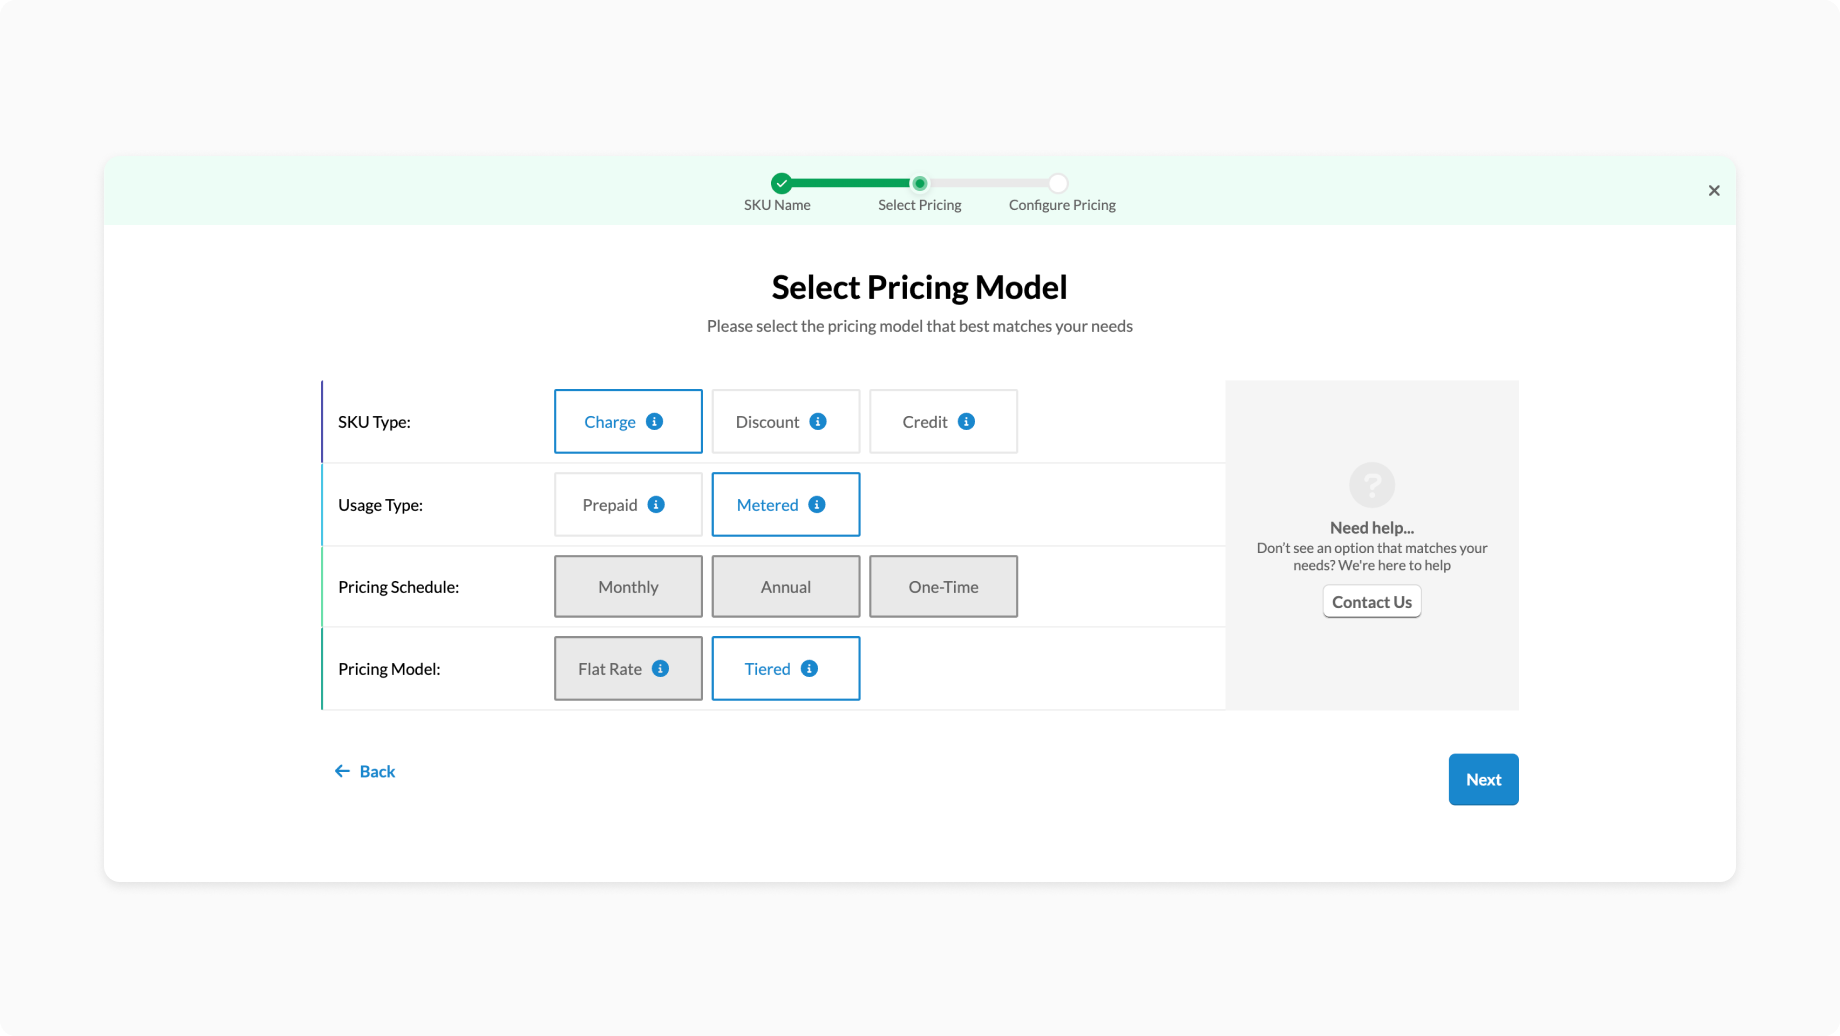
- In the next step select SKU Type: Charge
- Usage Type: Metered
All other options will become disabled. You can proceed to the next step.
In the next step, Configure pricing by providing the Price per unit for all your Tiers associated with a SKU. If you only have 1 pricing tier, simply set the Quantity, Price Per Unit, and Monthly Fee values for that tier and Save.
If you have multiple tiers, you can add more by copy-pasting your values directly from an Excel sheet or by following next guides:
- Click on the blue plus button
- Update the minimum and maximum quantity values,
- Update the Price per unit value
- Update Monthly Fee values
- Repeat steps 1 - 5 for each of the tiers in your SKU’s pricing model.
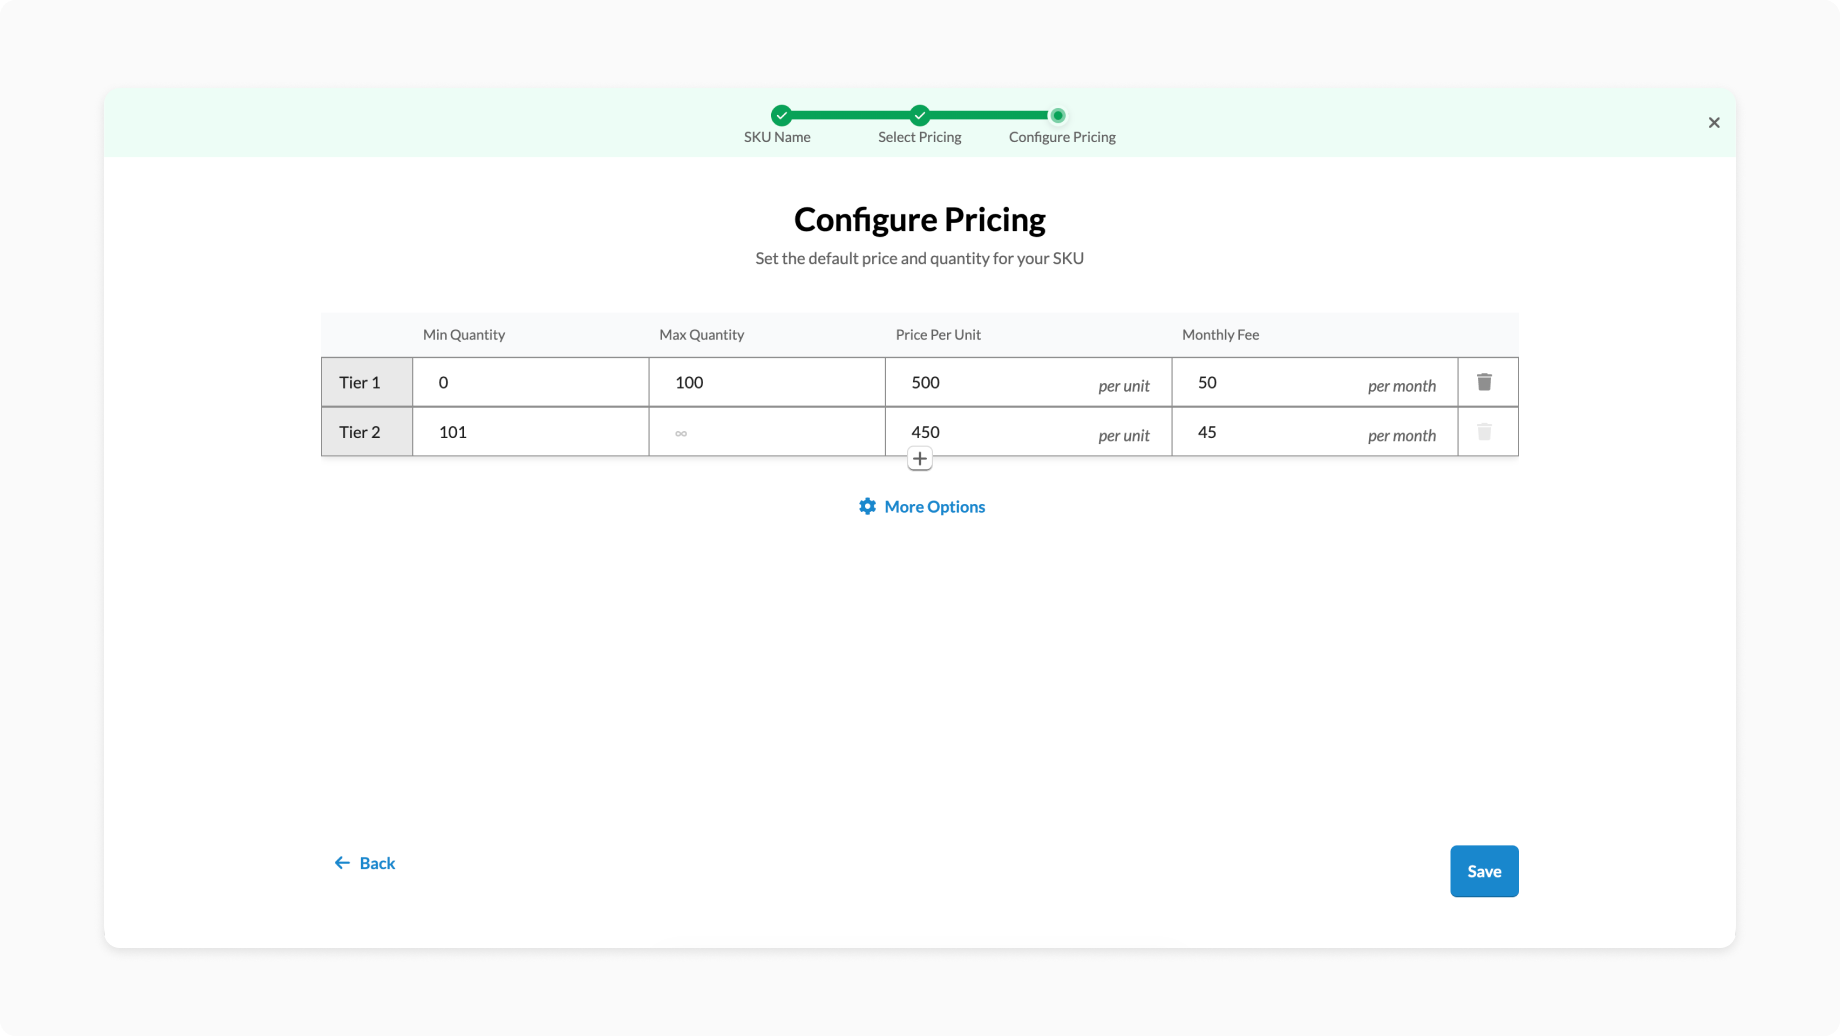
Click the More Options button to reveal the following sections:
- List price & quantity
- Currency and Unit Name
- Number of allowed decimal places
Click Save to save and create your SKU.
2. Fill in details
Once SKU is created you will be redirected to SKU Detail/Edit page where you can review all provided information or continue editing fields not surfaced in SKU creation wizard. Continue filling in all relevant information for your SKU. The SKU Name will be used only within RevOps while the Line Item Title will be what your customer sees. Include any specifying language in the Description field, like how burst pricing works, what rate limits are set to, or how the customer will be billed for the SKU.
3. Save the SKU
After you’re happy with how you’ve set up your SKU, scroll to the bottom of the page, and click the Save button in the bottom right corner.
If you have Salesforce or HubSpot connected to your Workspace, confirm that the respective Salesforce Integration or* HubSpot Integration tabs have their IDs fields automatically filled in.
Use the SKU
When quoting, click the Add SKUs button to create a new line item with your new metered priced SKU. For display purposes, you might want this line item in its own pricing table so you can include special terms on how metered products will be handled in specific scenarios.
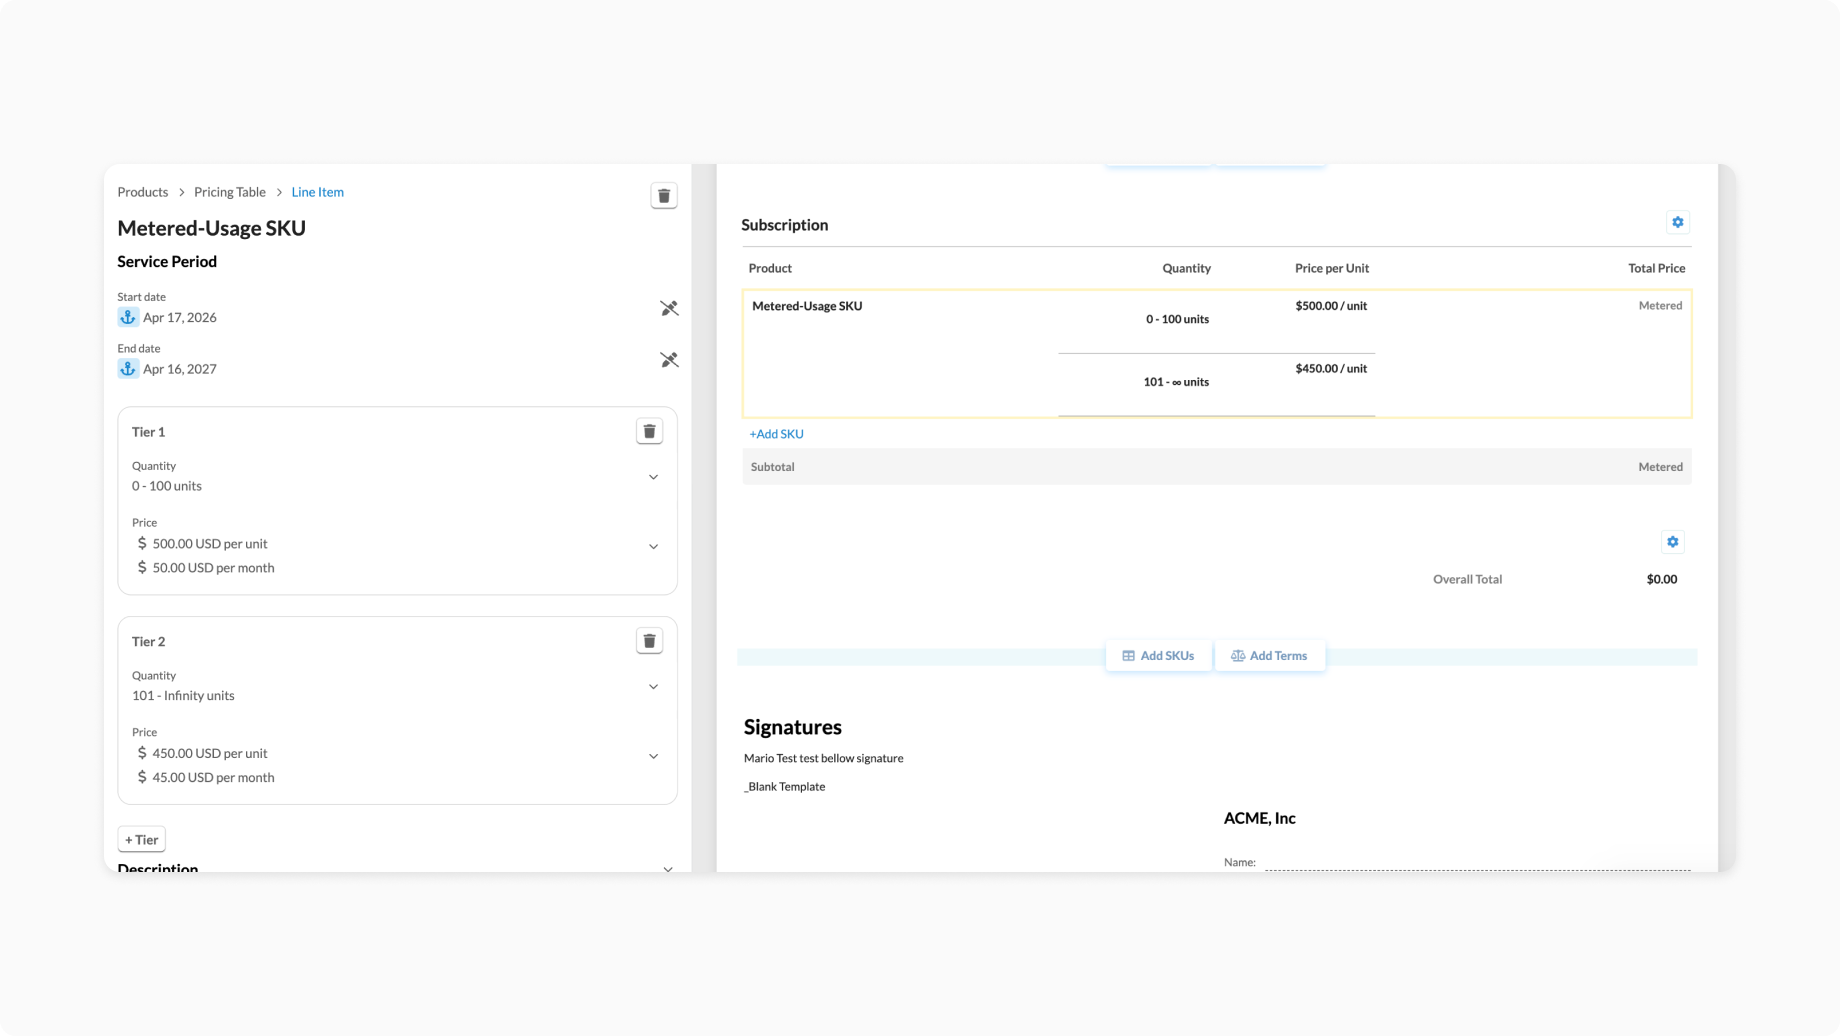
Now, your customers can see the extra rates they would be invoiced if they've surpassed the original quantities purchased.