How to Create a Progressive Tiered Pricing SKU
Use progressive tiered pricing (also known as graduated) if you want to charge different rates for units that fall into different tiers on the same line item. For example, if the first 10 units should be sold at $25 per unit, then for units after that the price is $20 such that an order of 15 units would be priced at 10 * $25 + 5 * $20 = $350.
Pre-requisites
Before we begin, you should decide if your product or service will be using a one-time, monthly, or annual pricing schedule. Meaning, will you be charging your users one time, once a month, or once a year?
This is only for a SKU’s pricing and not its billing. RevOps provides a Billing Frequency term to allow you to bill customers at a different interval than your pricing.
1. Create a New SKU
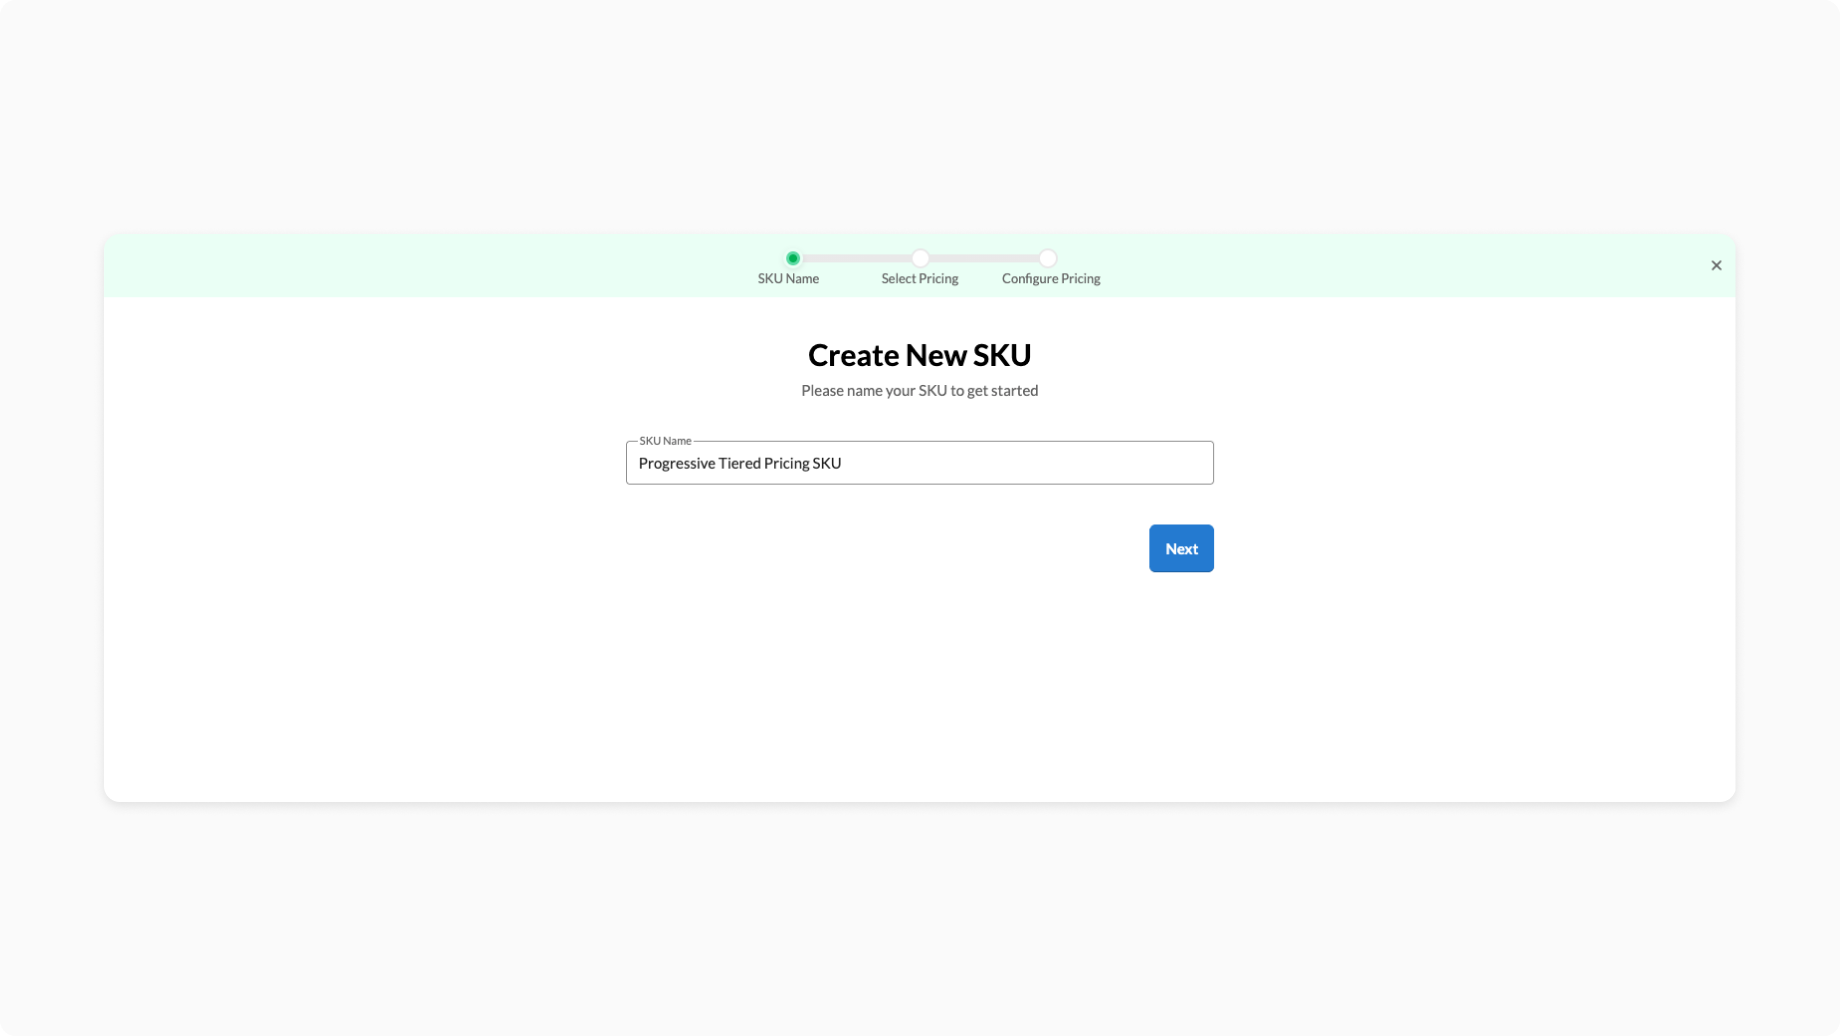
To create a Progressive Tiered Pricing SKU, start by going to the SKUs settings page (Hover on Settings, click the 1st item in the list, SKUs). Once there, create a new SKU using the Create SKU button.
In the SKU creation wizard, first define a SKU Name.
In the next step, select
- SKU Type: Charge,
- Usage Type: Prepaid,
- Pricing Model: Tiered.
It is important that you select Tiered here. We will add the tiered pricing in a later step.
For Pricing Schedule select:
- Annual - if you are charging an annual price
- Monthly - if you are charging a monthly price
- One time - if you are charging a one-time price
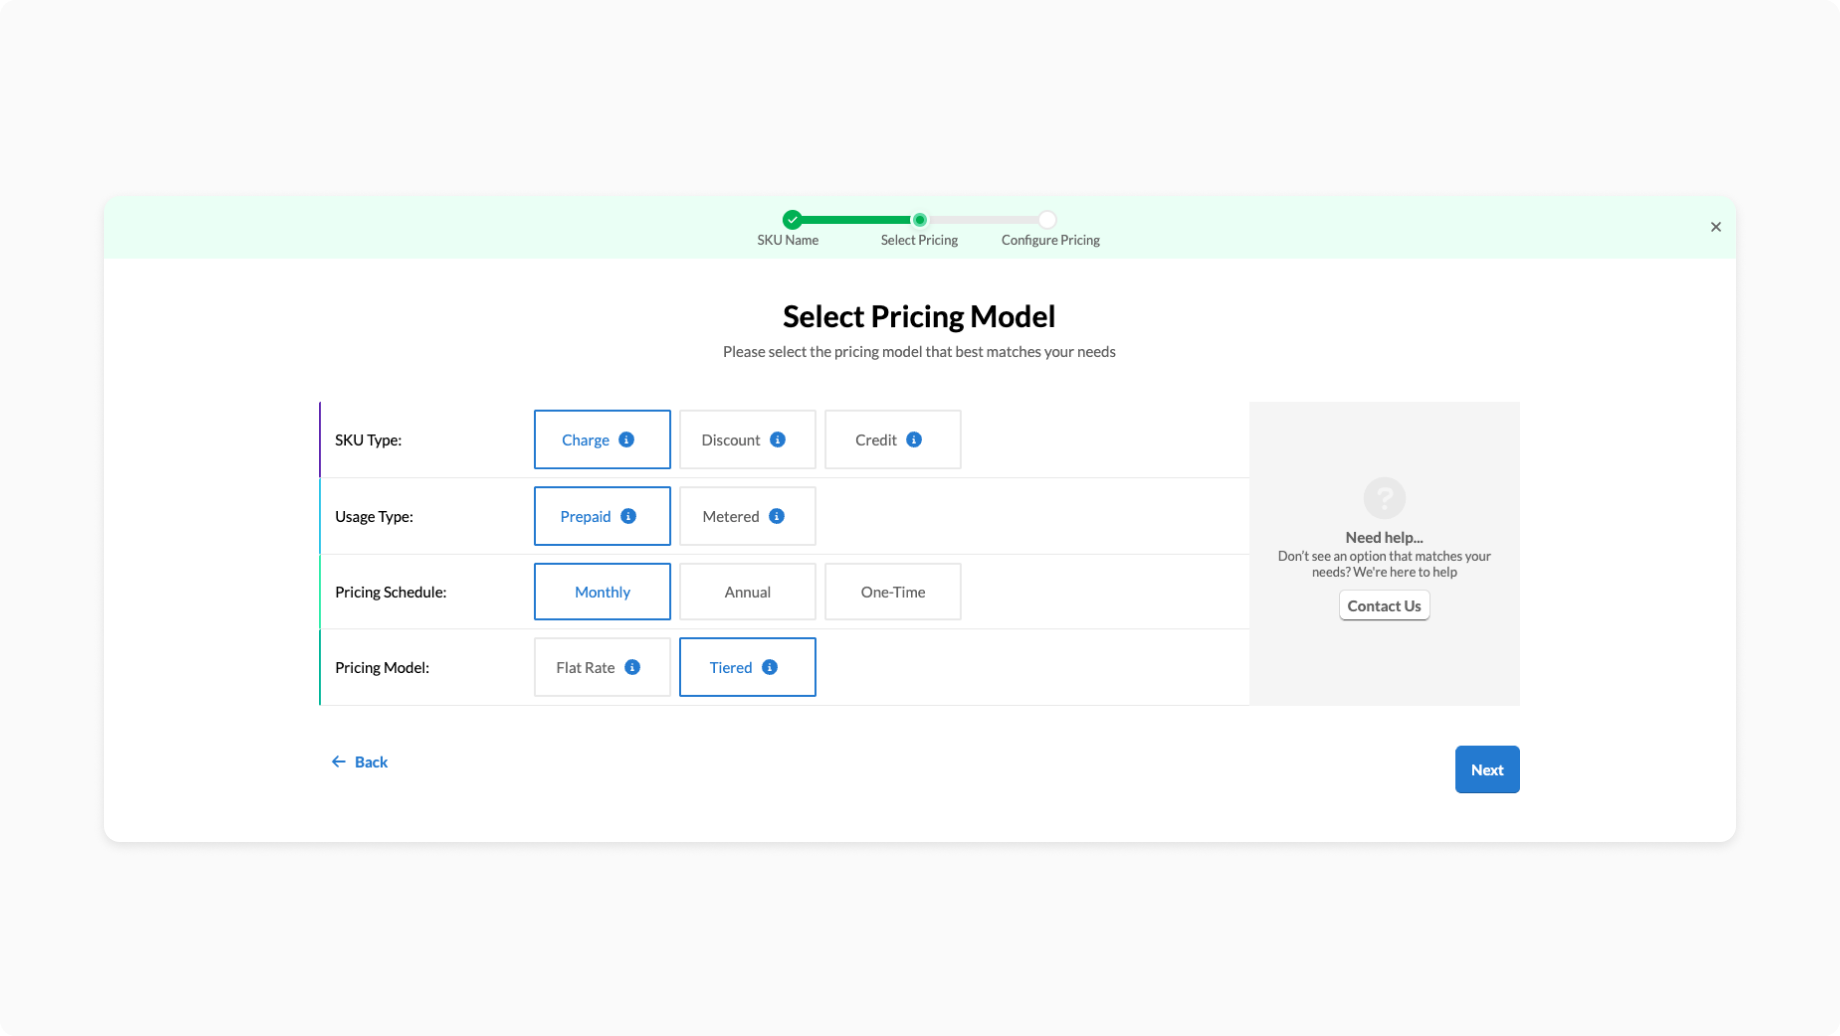
Click Next to continue to the next step.
In this step, select the Progressive Tier Pricing Model. You will be presented with a table where you can define the minimum and maximum quantity, and price per unit. You can add as many tiers as you need and can always edit the tiers later.
You can copy/paste your tier information from a CSV or Google Sheet directly into the table.
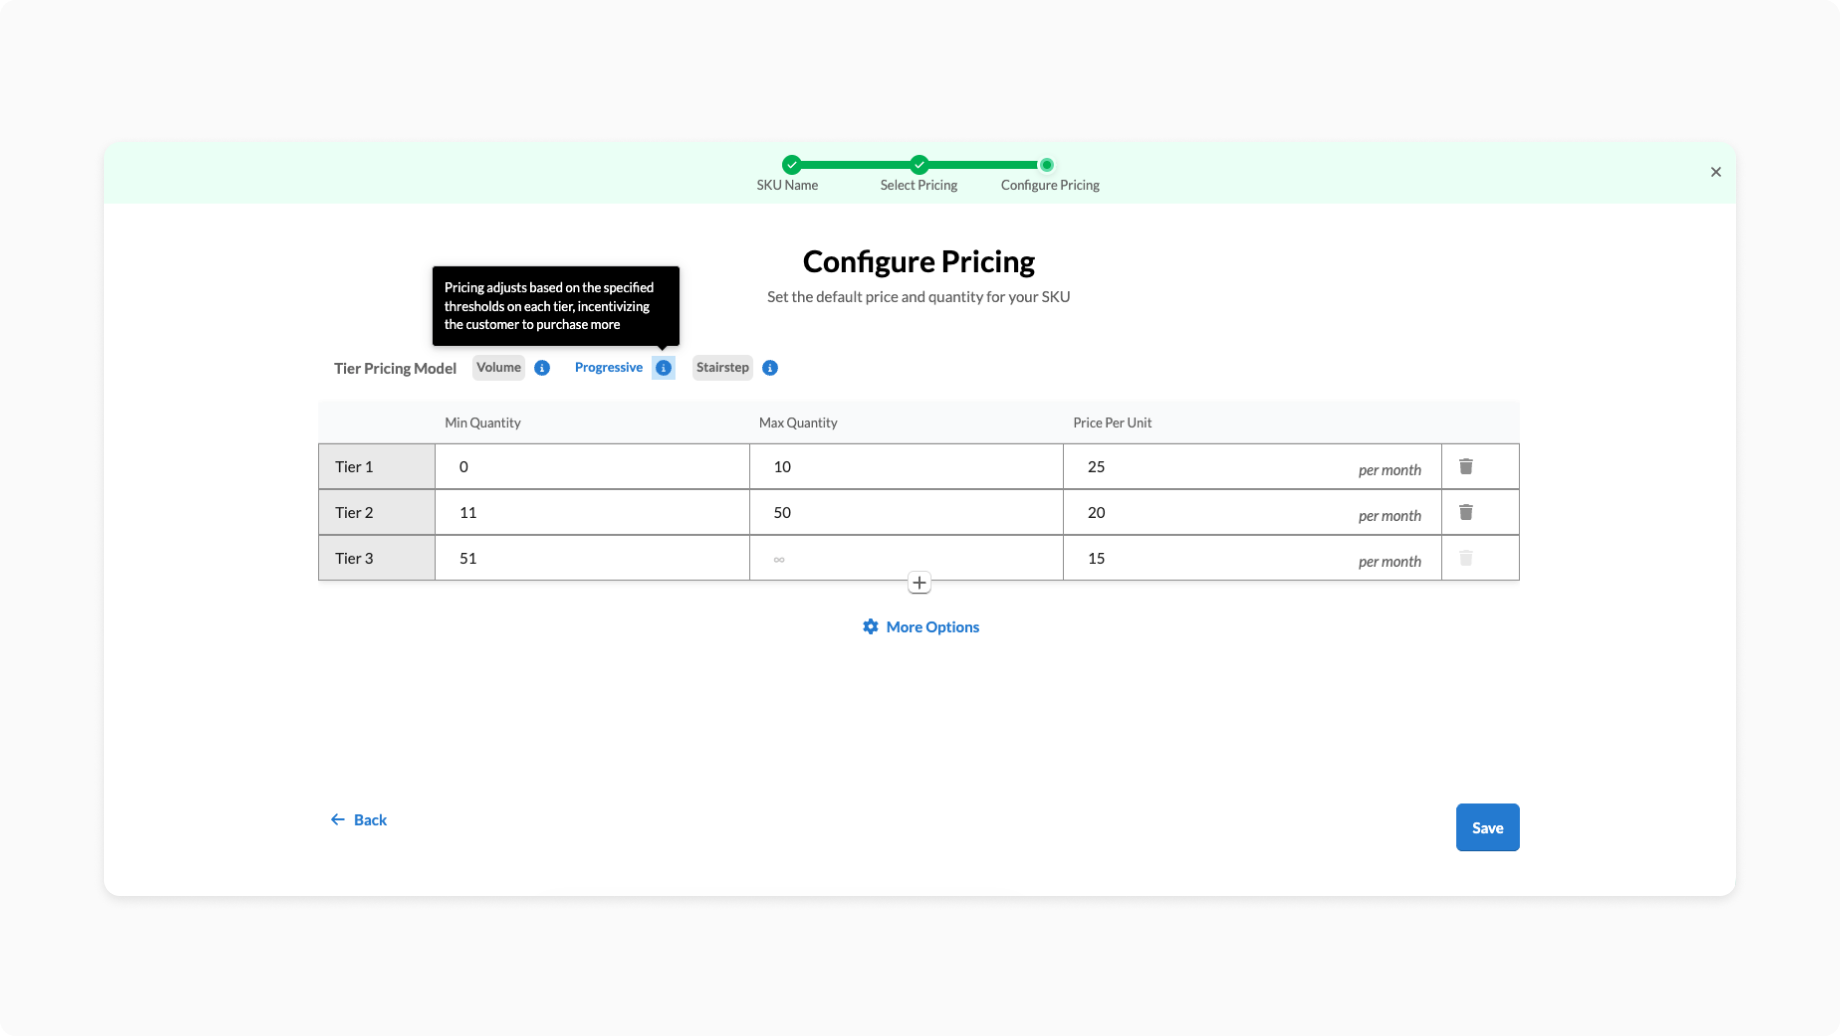
Click Save to save and create your SKU.
If you have Salesforce or HubSpot connected to your Workspace, confirm that the respective Salesforce Integration or HubSpot Integration tabs have their IDs fields automatically filled in.
Use the SKU
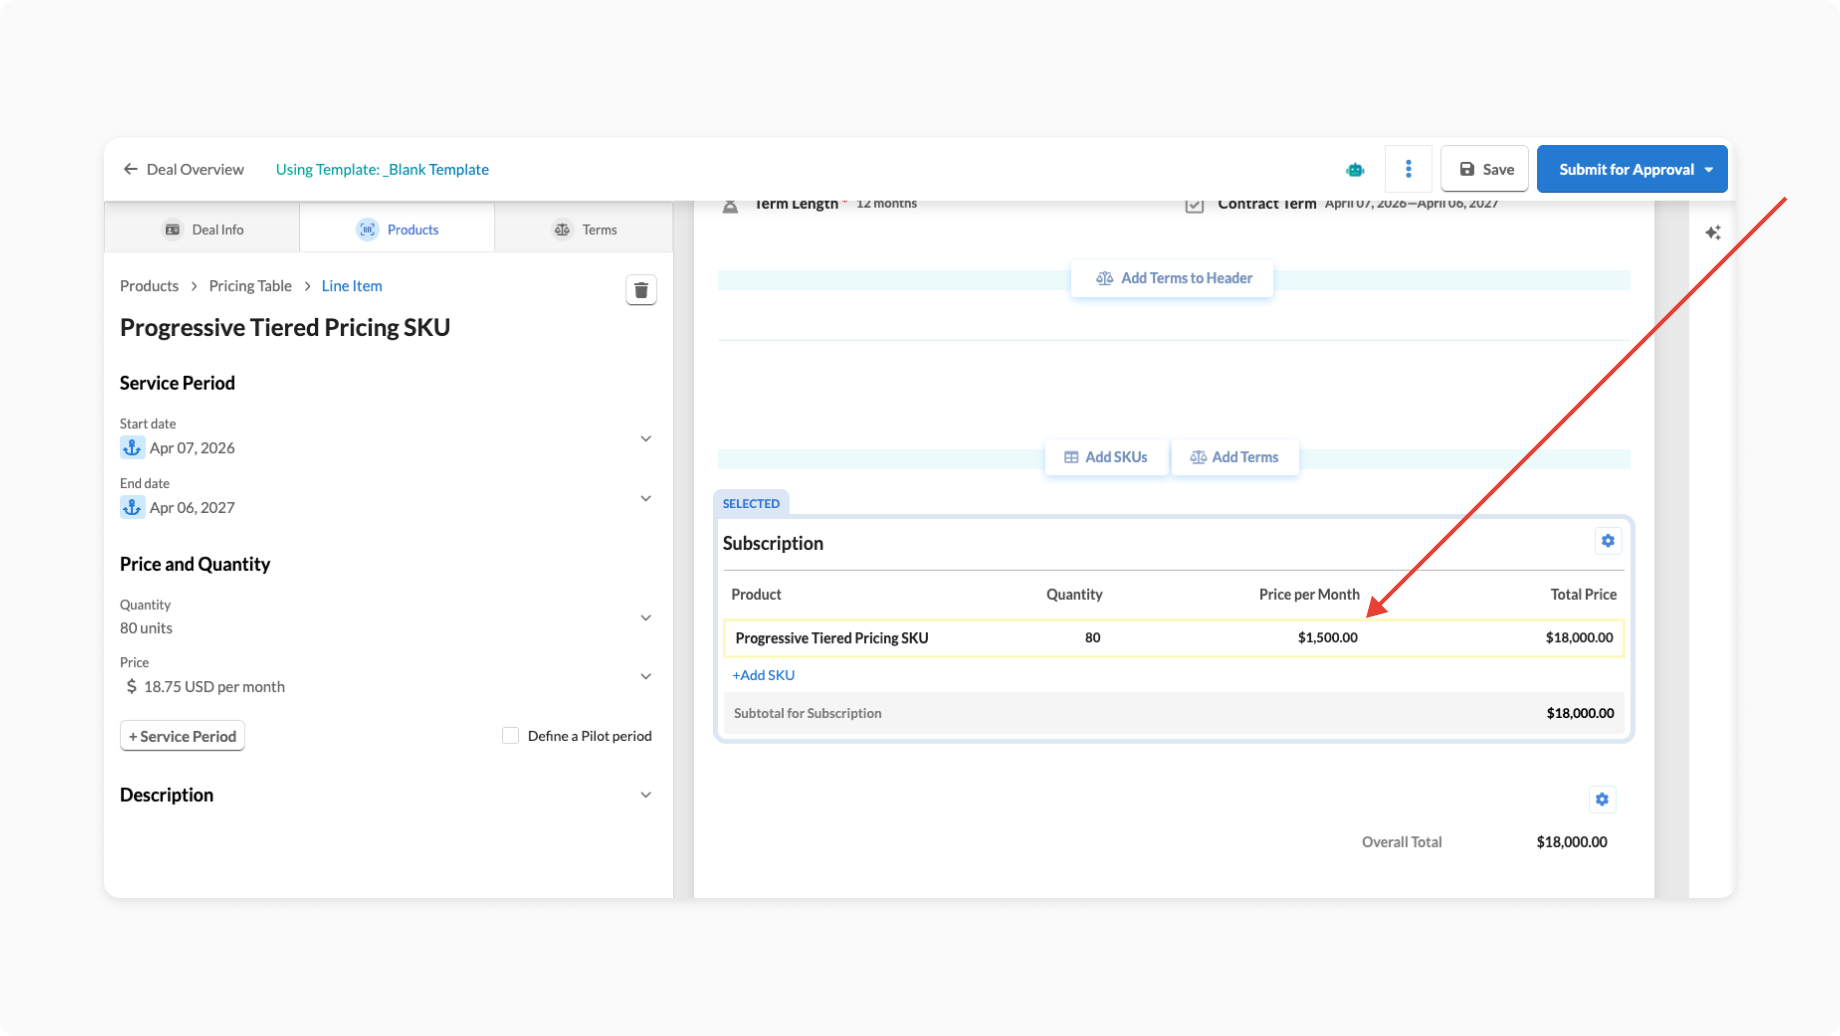
To start quoting, click on "Create new Deal". On the deal, click the Add SKUs button to create a new line item with your progressive tiered pricing product. Click the Done button to create a pricing table, titled "Subscription" by default, with your SKU as a line item. To learn more about how to adjust the display of this table, take a look at this article.
Test entering different quantities on the left side and verify the pricing is as you expect. In the example below, the quantity is 80 units, which is being calculated per the pricing table above as 10 units * $25 + 40 units * $20 + 30 units * $15 = $1,500.