How to Create a Schedule SKU
Schedule pricing models are prevalent in the consumer space and are more commonly known as Free Trials. RevOps knows these as Schedule, but they can be called Ramped, Trial, and Pilot pricing.
Pre-reqs
Before we begin you should decide if your product/feature will be using a monthly or annual pricing strategy. Meaning will you be charging your users once a month or once a year and using the period as the limit for rolling over leftover credits, etc.
This is only for a SKU’s pricing and not it’s billing. RevOps provides a Billing Frequency term to allow you to bill customers at a different interval than your pricing.
1. Create a new SKU
To create a Schedule SKU, you need to start by:
- Go to Settings > SKUs.
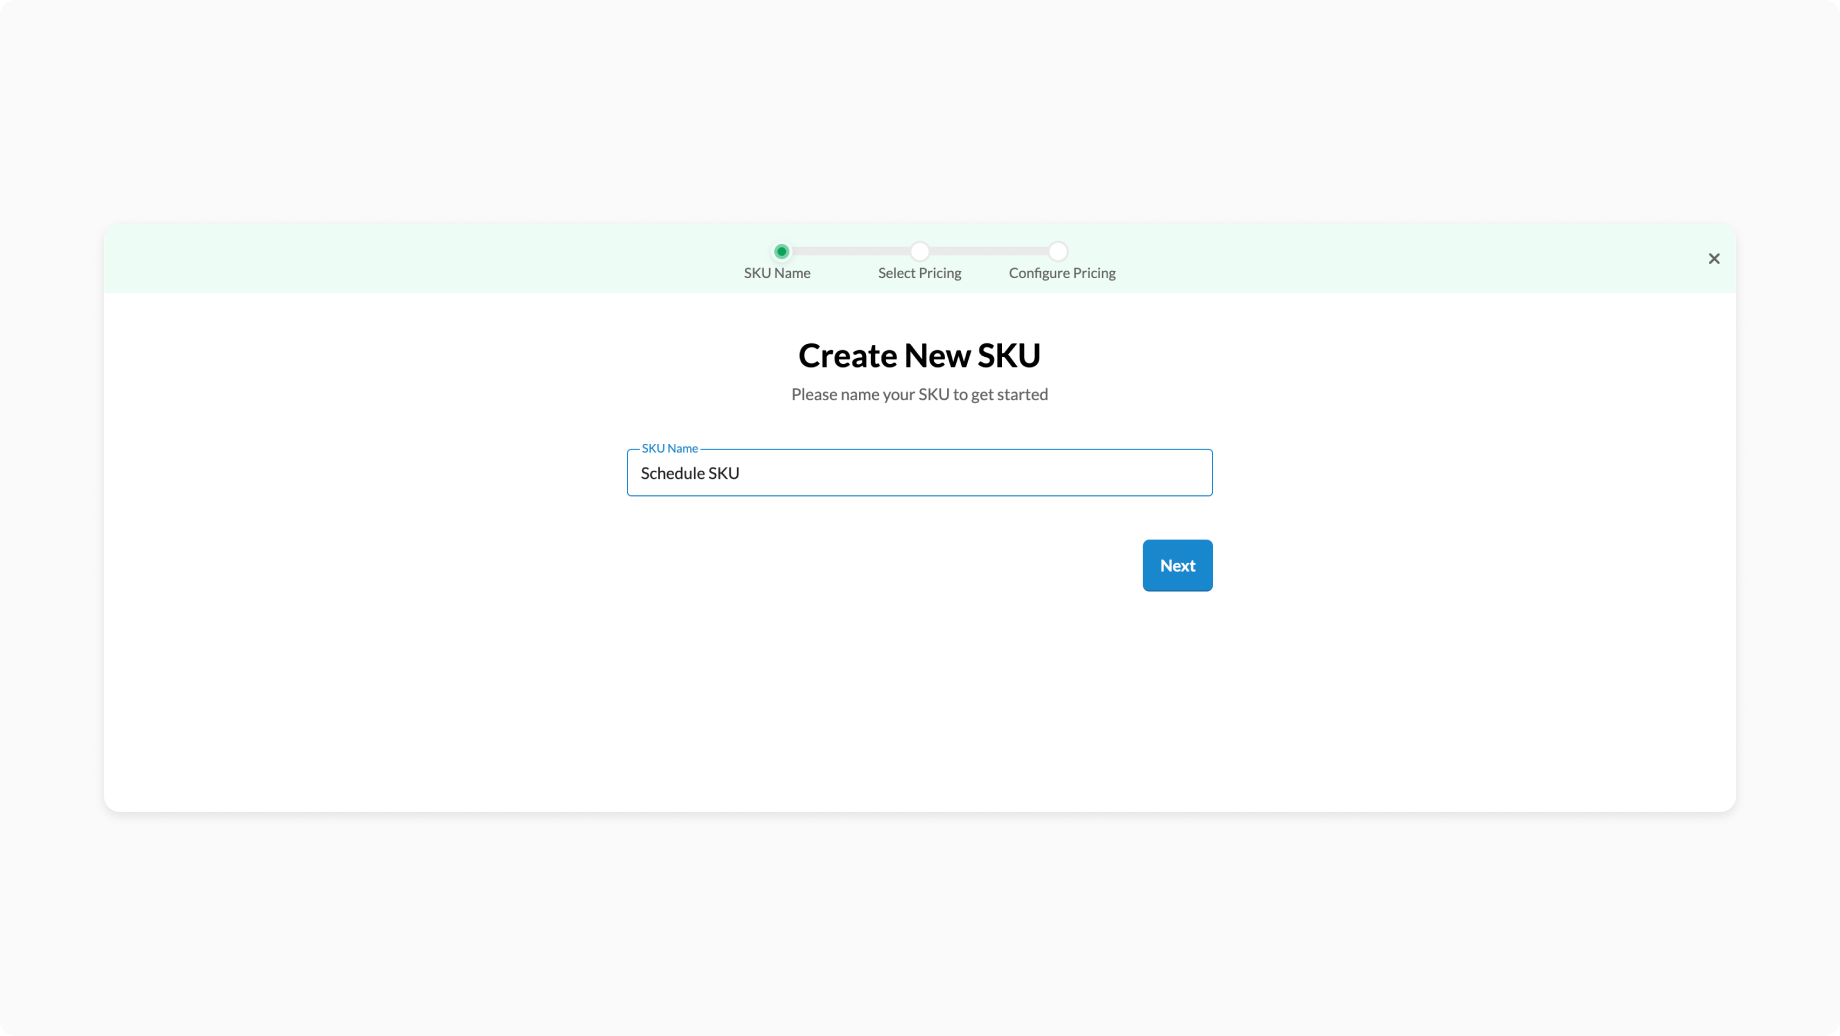
- Click Create SKU.
- In the SKU creation wizard first define a SKU name.
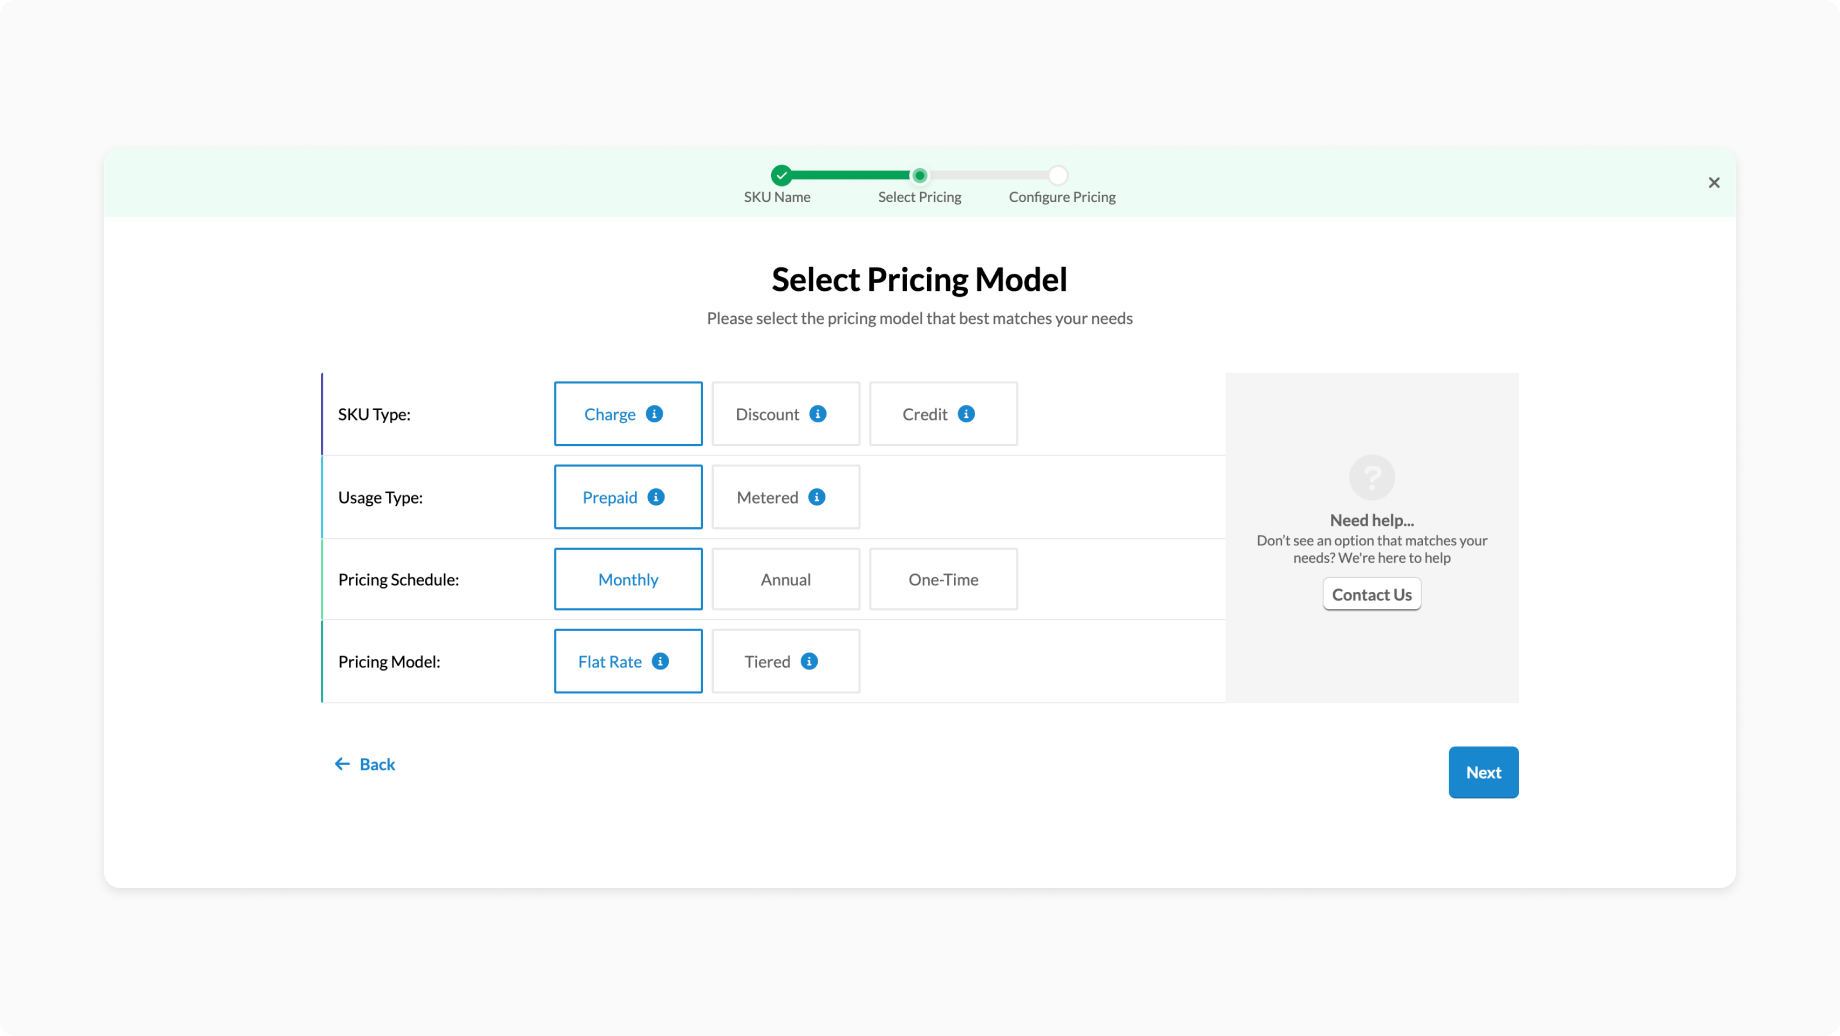
- In the next step select SKU Type: Charge
- Usage Type: Prepaid and
- Pricing Model: Flat Rate or Tiered (both options support Scheduled SKUs).
- For Pricing Schedule select:
- Annual - if you charging an annual price
- Monthly - if you are charging a monthly price
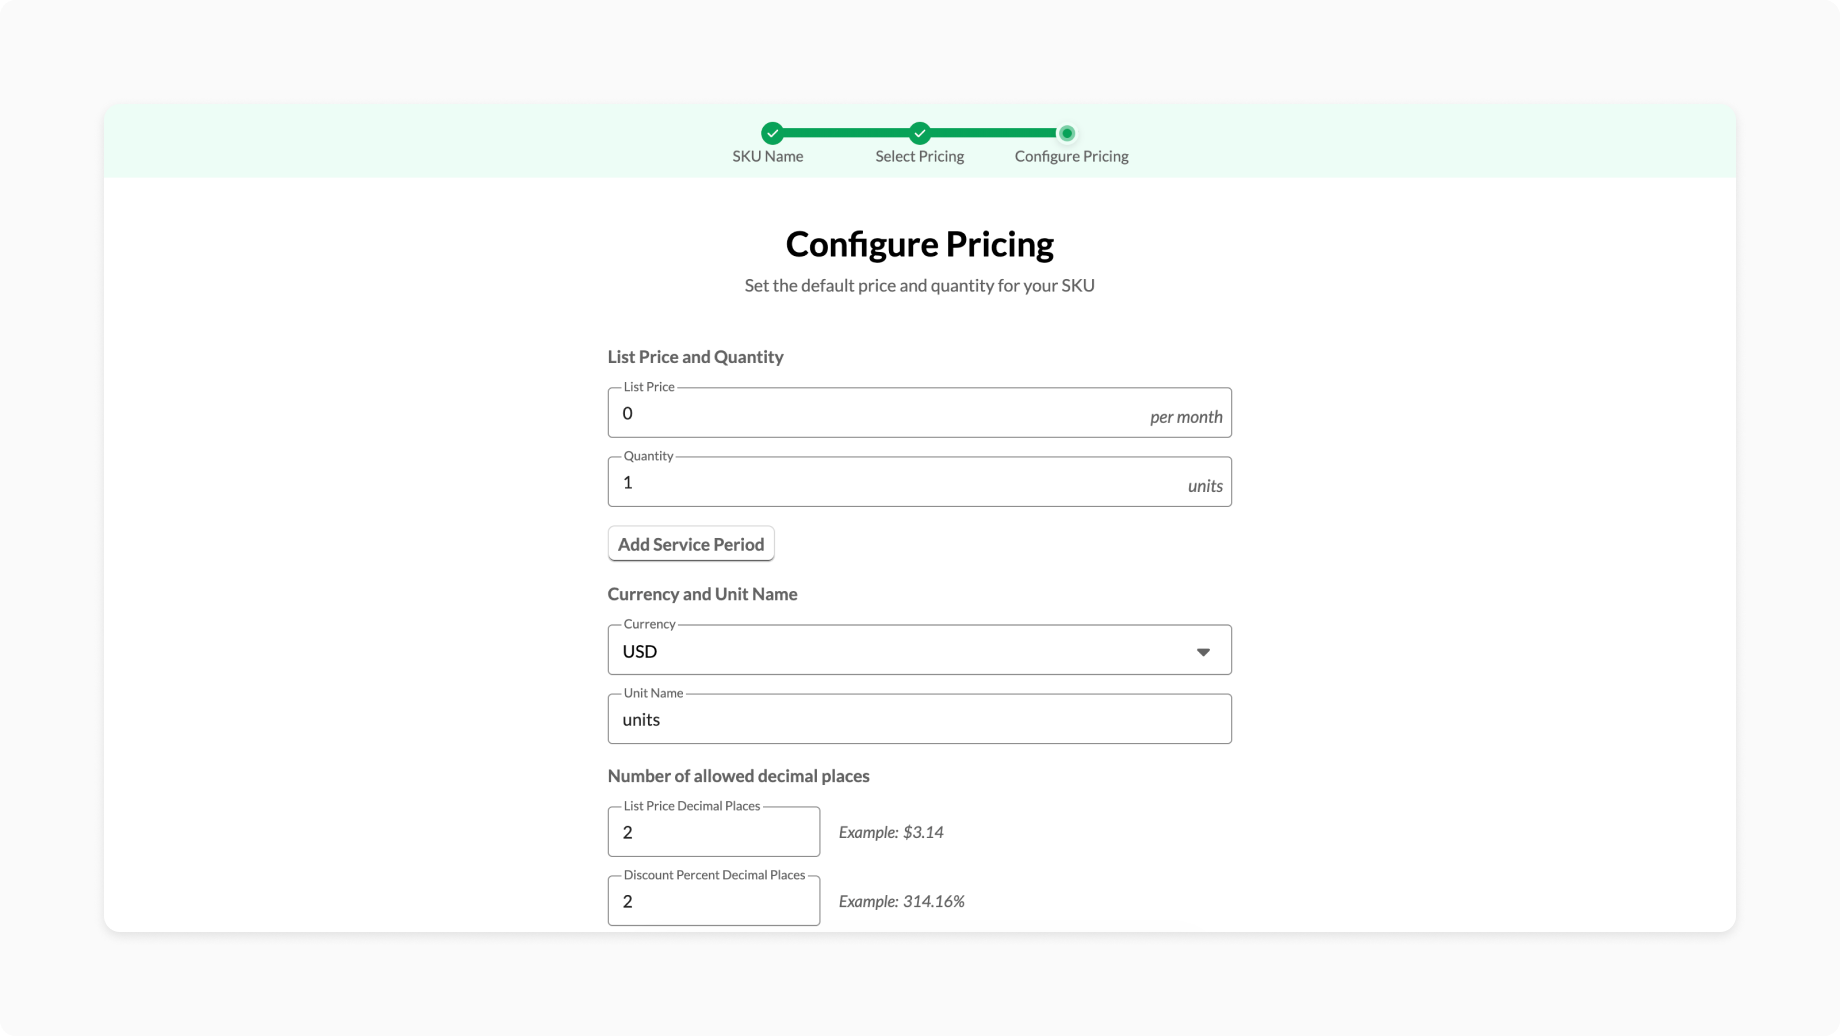
In the next step define your price. Click More options button to reveal the following sections:
- List price & quantity
- Add service period - Available for Monthly and Annual Pricing schedules.
- Currency and Unit Name - Customize Unit name since it will reflect on a deal (ex: license, seat, etc.)
- Number of allowed decimal places
Click Add Service periods to add as many periods as you need for your product. Here is what each field is used for:
- Service Period Duration - Use this text box to define the default number of days, months or years, the period, its quantity, and pricing should be effective.
- List price - Use this text box to define the default list price of one unit of the SKU either per-month or per-year . For flexibility, each pricing period can have a different subscription interval.
- units (Quantity) - Use this text box to define the default quantity the customer should expected for this Pricing Period.
- Add another Service period - Use this button to add another Pricing Period and ramp the SKU’s pricing.
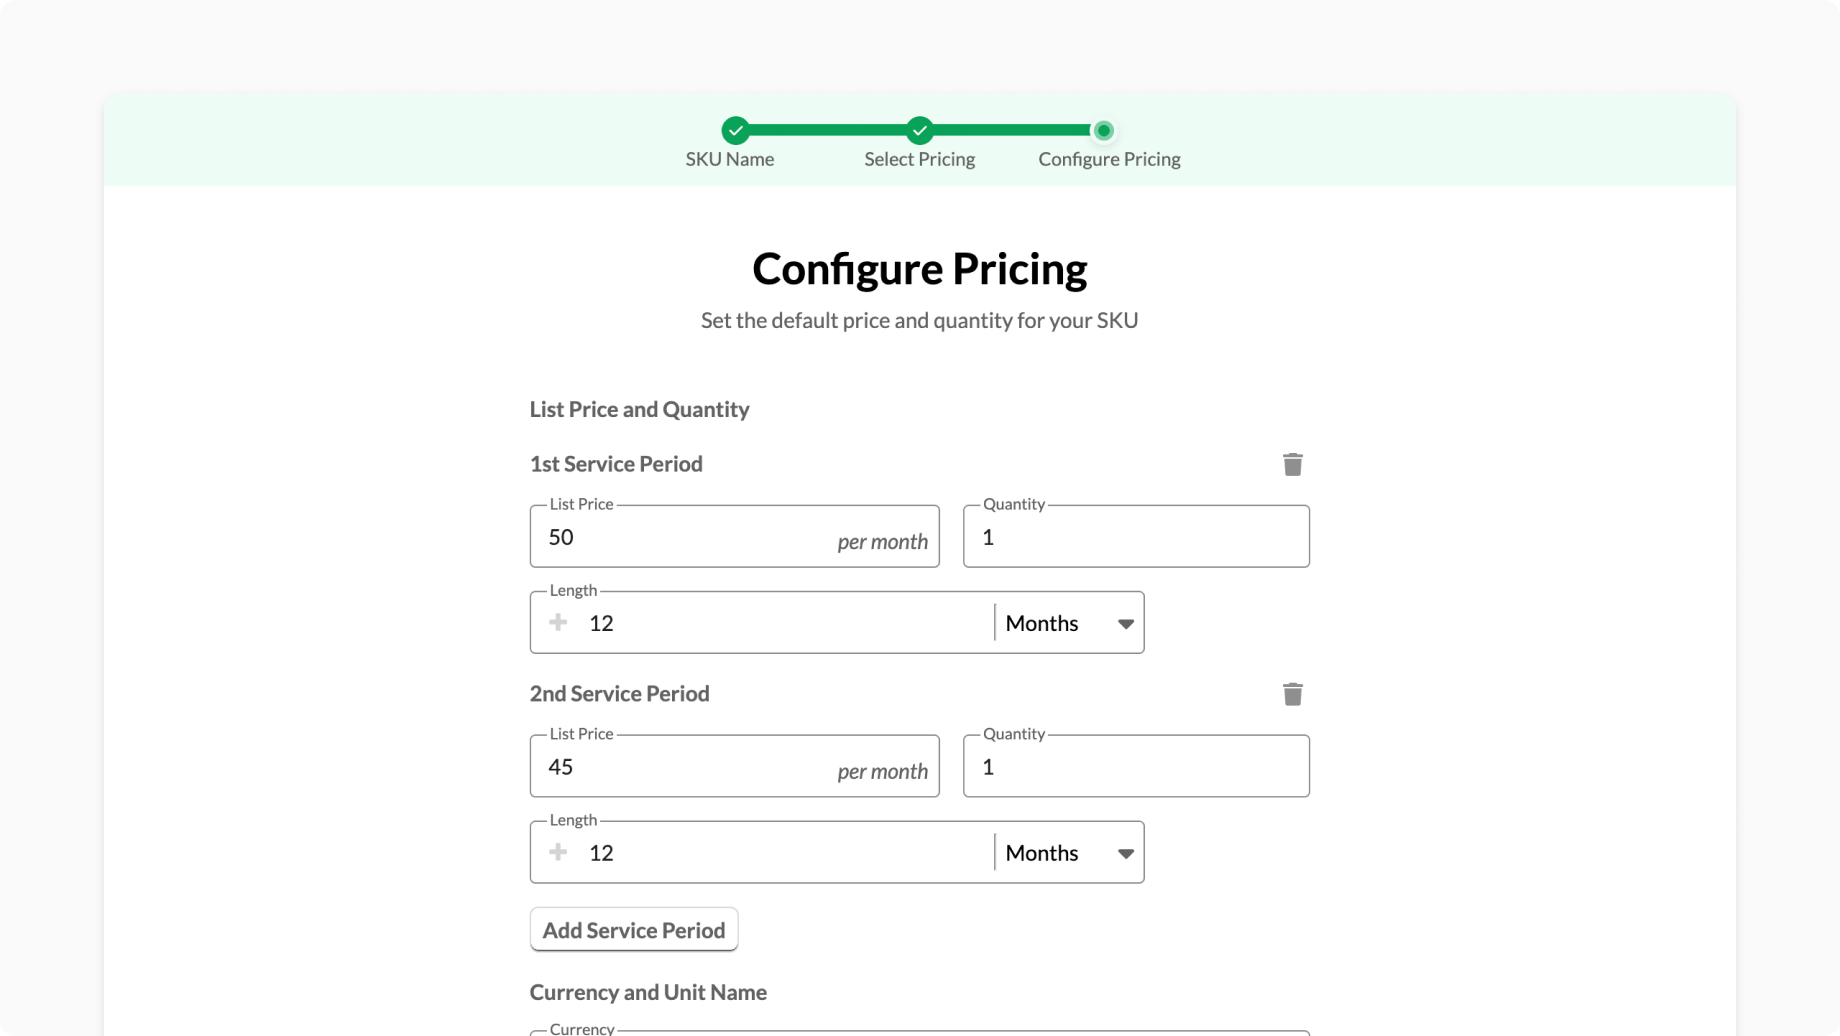
- Click Save to save and create your SKU.
2. Fill in details
Once SKU is created you will be redirected to SKU Detail/Edit page where you can review all provided information or continue editing fields not surfaced in SKU creation wizard. Continue filling in all relevant information for your SKU. The SKU Name will be used only within RevOps while the Line Item Title will be what your customer sees. Include any specifying language in the Description field, like any special considerations or fees to keep in mind once the pilot period ends.
3. Add Pilot Period to Pricing Schedule
To add pilot period to pricing schedule when needed:
- Click on the Pricing tab
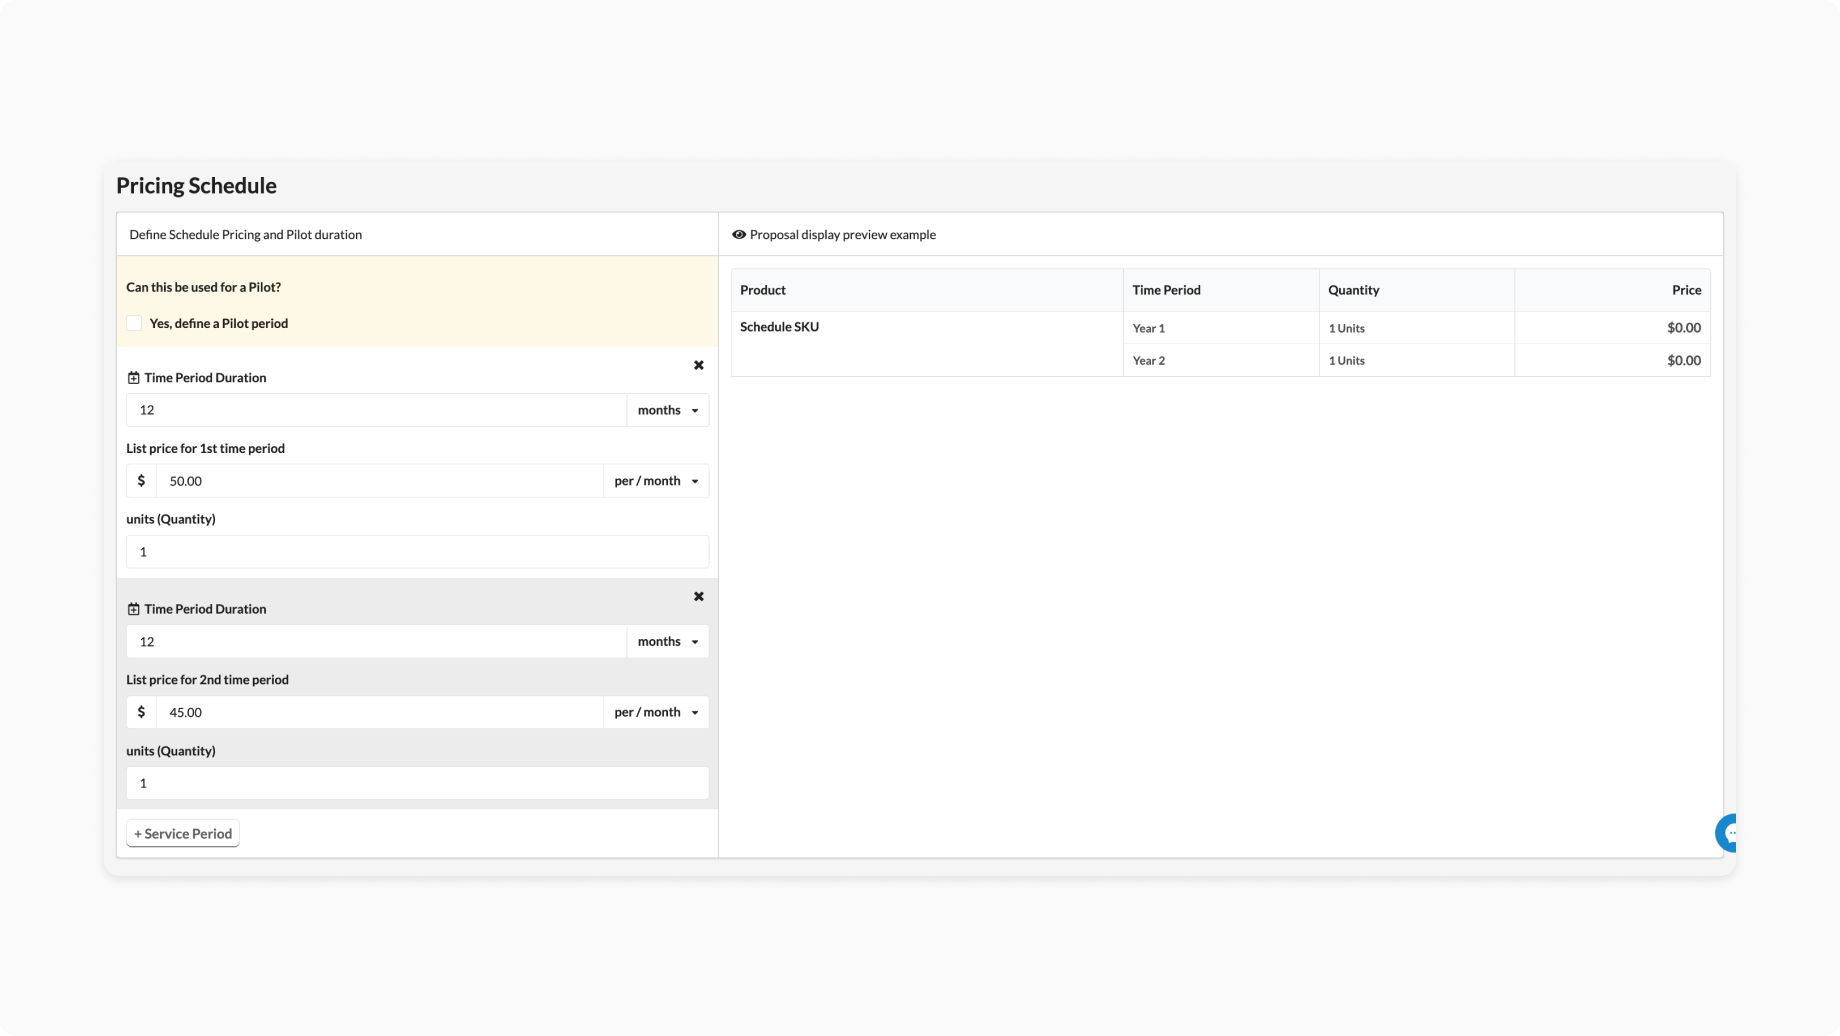
- Scroll down to find the Pricing Schedule section This is where you configure the SKU’s pricing schedule.
- Can this be used for a Pilot? Check the Yes, defined a Pilot period checkbox to add a Pilot Pricing Period to the beginning of the Pricing Schedule. This Pricing Period is the same as all other Pricing Periods expect for the special display indicating that it’s a “pilot” period.
4. Save the SKU
After you’re happy with how you’ve set up your SKU, scroll to the bottom of the page, and click the Save button in the bottom right corner.
If you have Salesforce or HubSpot connected to your Workspace, confirm that the respective Salesforce Integration or* HubSpot Integration tabs have their IDs fields automatically filled in.
Use the SKU
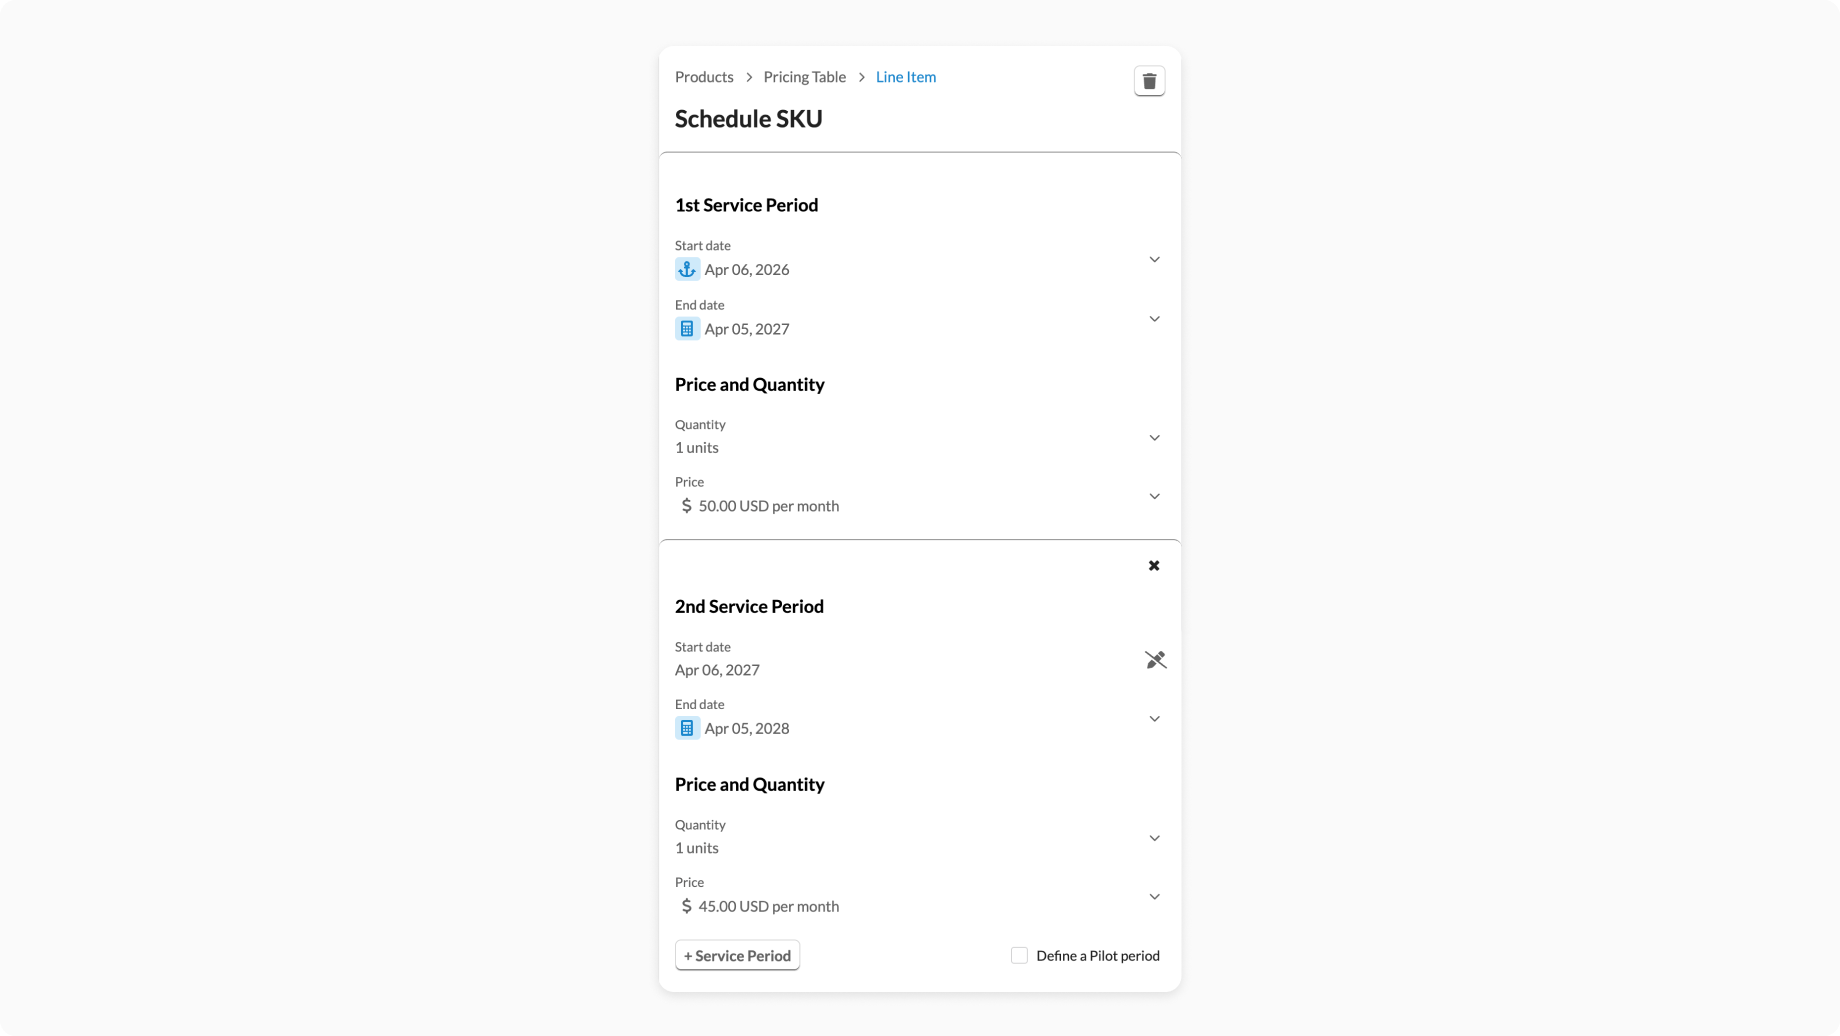
To start quoting, head to RevOps, and click on the Create Deal button in the top right corner. On the deal, click the Add SKUs button to create a new line item with your new Schedule SKU. Click the Done button to create a pricing table, titled "Subscription" by default, with your SKU as a line item. To learn more about how to adjust the display of this table, take a look at this article. Now you can adjust the Quantity sold and apply a Discount, if appropriate. You can customize the pricing schedule from the default by opening drawers:
- Start Date
- End Date
- Quantity
- Price
- The X button to remove pricing periods
- + Service period button to add pricing periods
- The Define a Pilot period checkbox to add a specially marked "pilot" pricing period
Admins can control which drawers are editable for each role. If a drawer isn’t expandable, it shows a pen-slash icon. Hover over the icon to learn why you don’t have permission to edit those fields.
Pricing Details
All pricing for Schedule SKUs is handled based on the dates set on the Pricing Schedule. If the total effective length of the Schedule line item is not a whole number of years or months, the price will be prorated to the number of days configured.