Managing Deals with Salesforce Opportunities
When putting together a Deal, a Salesforce Opportunity should be selected and associated with the Deal. By associating the Deal with an Opportunity, RevOps can:
-
Import Contacts and Addresses from Salesforce that can be used on the Deal.
-
Import Salesforce data as Variables that can be displayed on the agreement.
-
Insert Line Items from the Deal to the Opportunity Each time the Deal is saved, the following will occur:
-
The Price Book for the Opportunity will be configured to match the PricebookID of the Line Items included on the Deal.
-
If multi-currency support is enabled, the currency of the Opportunity will also be configured to match the currency of the Line Items on the Deal.
-
Opportunity Products are added to the Opportunity to match the Line Items on the Deal. In this guide, we’ll walk through how RevOps to associate the Deal to a Salesforce Opportunity. As a prerequisite, this guide assumes that you have connected your RevOps account to Salesforce. If you haven’t, we recommend connecting your Accounts first .
How are Opportunities associated with Deals?
Opportunities can be associated with a RevOps Deal two ways:
- By searching for and selecting the Salesforce Opportunity when creating the Deal in RevOps
- By assigning a Salesforce Opportunity ID to a Deal through URL Query Params
Search by Opportunity
When first creating the deal, you can search for and select a Salesforce Opportunity. Based on the Opportunity you select, RevOps will not only associate the Opportunity ID to the deal but also import the contacts and addresses associated with the Opportunity to use be used on deal.

Creating a Button in Salesforce to start creating RevOps Deals
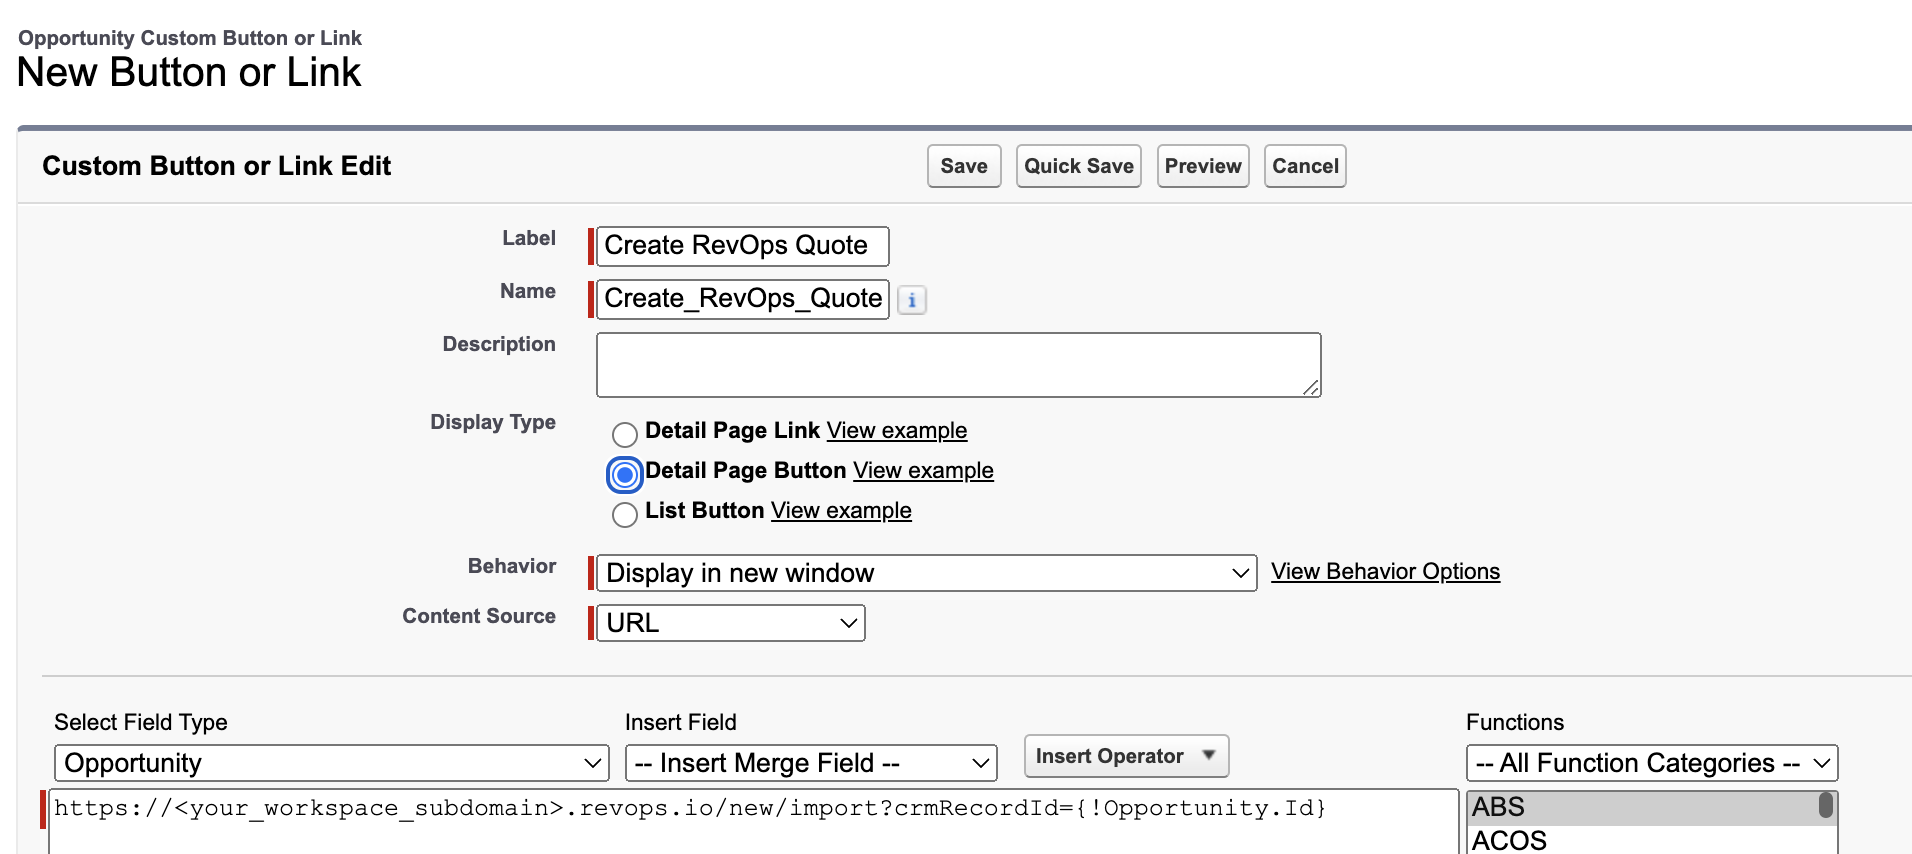
To simplify the experience of creating a Deal in RevOps from Salesforce, you may create a Salesforce custom button . When creating this button in Salesforce, configure the content source to URL and include a URL with the following format: You’ll need to personalize this URL with your "Workspace Subdomain". When this button is clicked on, you'll be able to select the template to start drafting your deal with and the Opportunity will automatically be associated to the RevOps deal.
https:/new/import?crmRecordId={!Opportunity.Id}
If you prefer to specify the template that should be used, you'll want to use the following URL where you need to specify both the "Workspace Subdomain" as well as the "Template ID".
https:/new/import/<template_id>?crmRecordId={!Opportunity.Id}
To test in sandbox mode, your sandbox URL may be used.
https:/new/import?crmRecordId={!Opportunity.Id}
Quotes
If you are using Quotes, you can also start from a Quote ID. When using a Quote ID, you must also specifiy the crmRecordType parameter.
https:/new/import?crmRecordId={!Quote.Id}&crmRecordType=quote
crmRecordType may be one of opportunity or quote. When not defined, opportunity will be assumed. A specific template and/or sandbox mode may also be used as noted above for Opportunity import, with the addition of the crmRecordType parameter.
The {!Opportunity.Id} and {!Quote.Id} text is not a RevOps placeholder and should be included in Salesforce. Salesforce will replace this with the ID of the current Opportunity or Quote. <your_workspace_subdomain> and <template_id> should be replaced with their respective values.
Template IDs will be different between live and sandbox.
Salesforce Configuration
In this case, when the button is clicked, RevOps will open in a new tab and the Opportunity will automatically be associated to the RevOps Deal with the template you’ve selected. Create a new button by selecting the relevant object in the Object Manager and selecting the Buttons, Links, and Actions option.
On the Salesforce side, your setup would look like the following:

Users can be restricted to only creating deals from within your CRM. Please contact support@revops.io to have the in-app creation button removed for users that are not admins or deal desk managers.
This can be used for cases such as:
- Conditionally choosing the correct template based on Opportunity data
- Preventing creating deals if data is missing or the Opportunity data does not meet certain criteria
- Ensuring the correct Opportunity is always connected to each deal
Legacy Flow
The legacy creation flow used the following URL formats:
https:/new/quote?oppId={!Opportunity.Id}
https:/new/quote/<template_id>?oppId={!Opportunity.Id}
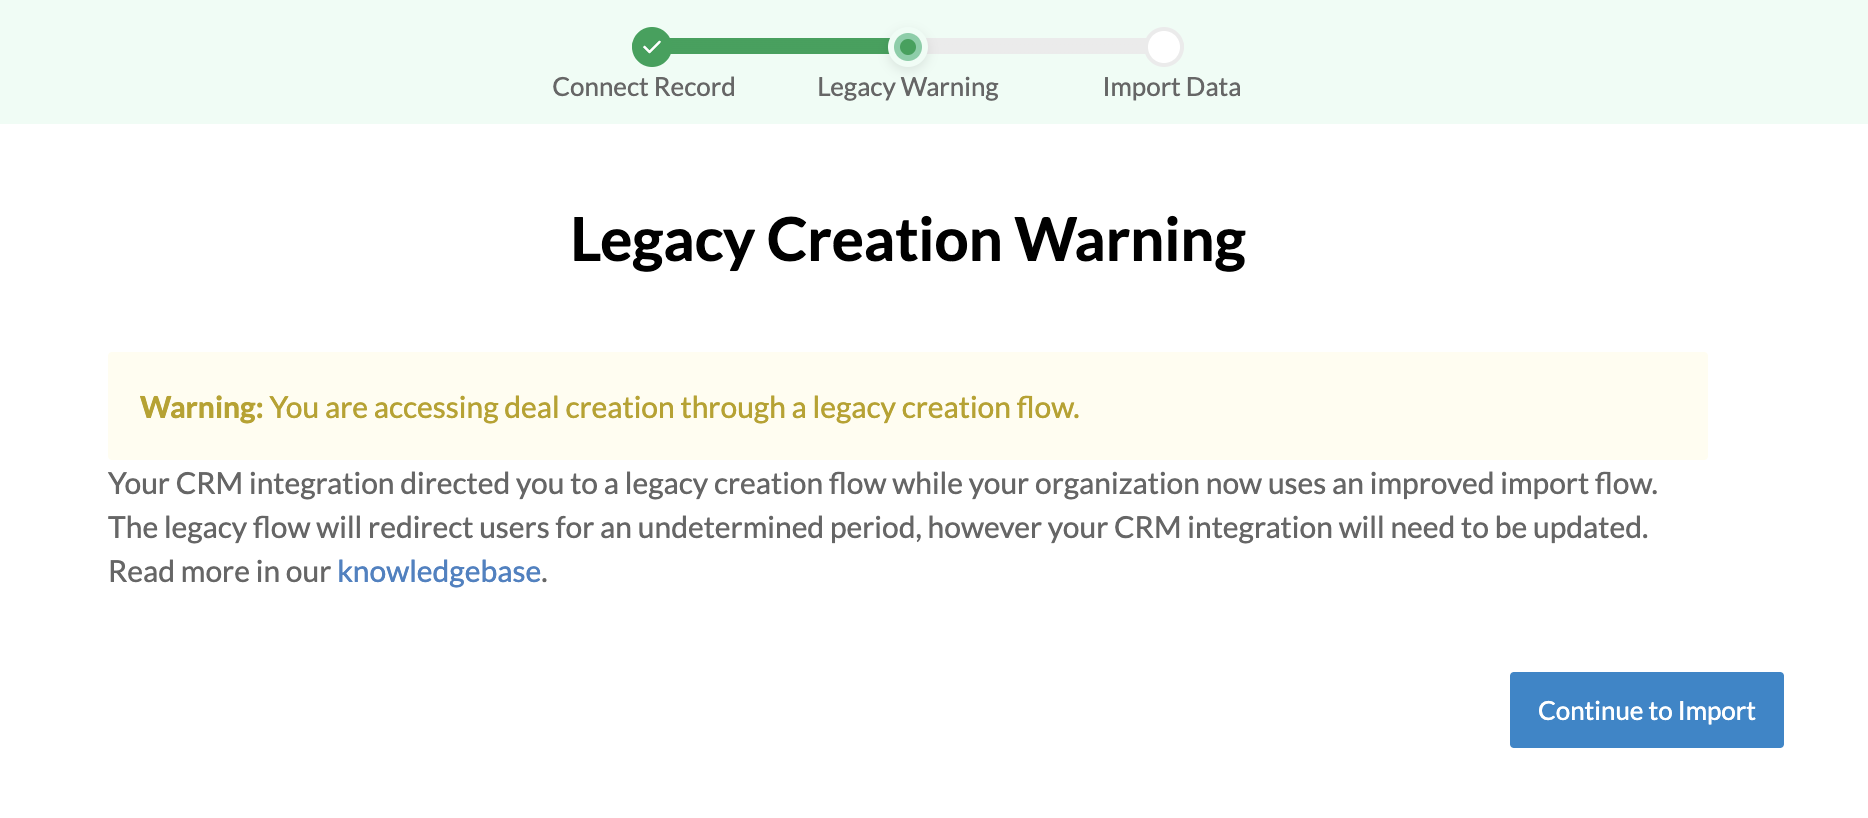
If your organization has been upgraded to the new flow and is configured to use these URLs, you will see the following screen when creating a deal. This screen will only be shown to admins. These URLs will automatically redirect, but will stop working in the future. You should update your buttons to use the current URL schema.
