HubSpot
The RevOps integration built for HubSpot enables you to map data from HubSpot into your RevOps deals and from RevOps back to HubSpot. This simplifies your deal creation process and allows you to maintain data integrity between RevOps and HubSpot. Connect RevOps to your HubSpot account to be able to:
- Create Agreements directly from your HubSpot Deal.
- Bi-directionally synchronize the line items on your RevOps deal to HubSpot.
- View the approval and signature status of your agreements on your HubSpot Deal.
- Import your HubSpot Contacts and Account addresses to your RevOps Deal.
- Synchronize the total contract value of your RevOps deal to HubSpot.
Learn more about our integration on our HubSpot Marketplace listing page.
How It Works
Connecting RevOps to HubSpot
Only "super-admins" of HubSpot can add apps to the HubSpot account. Before connecting RevOps to your HubSpot account, please make sure the user account connecting to HubSpot has "super-admin" permissions.
Connecting RevOps to HubSpot only takes a few steps:
1. Connect to HubSpot
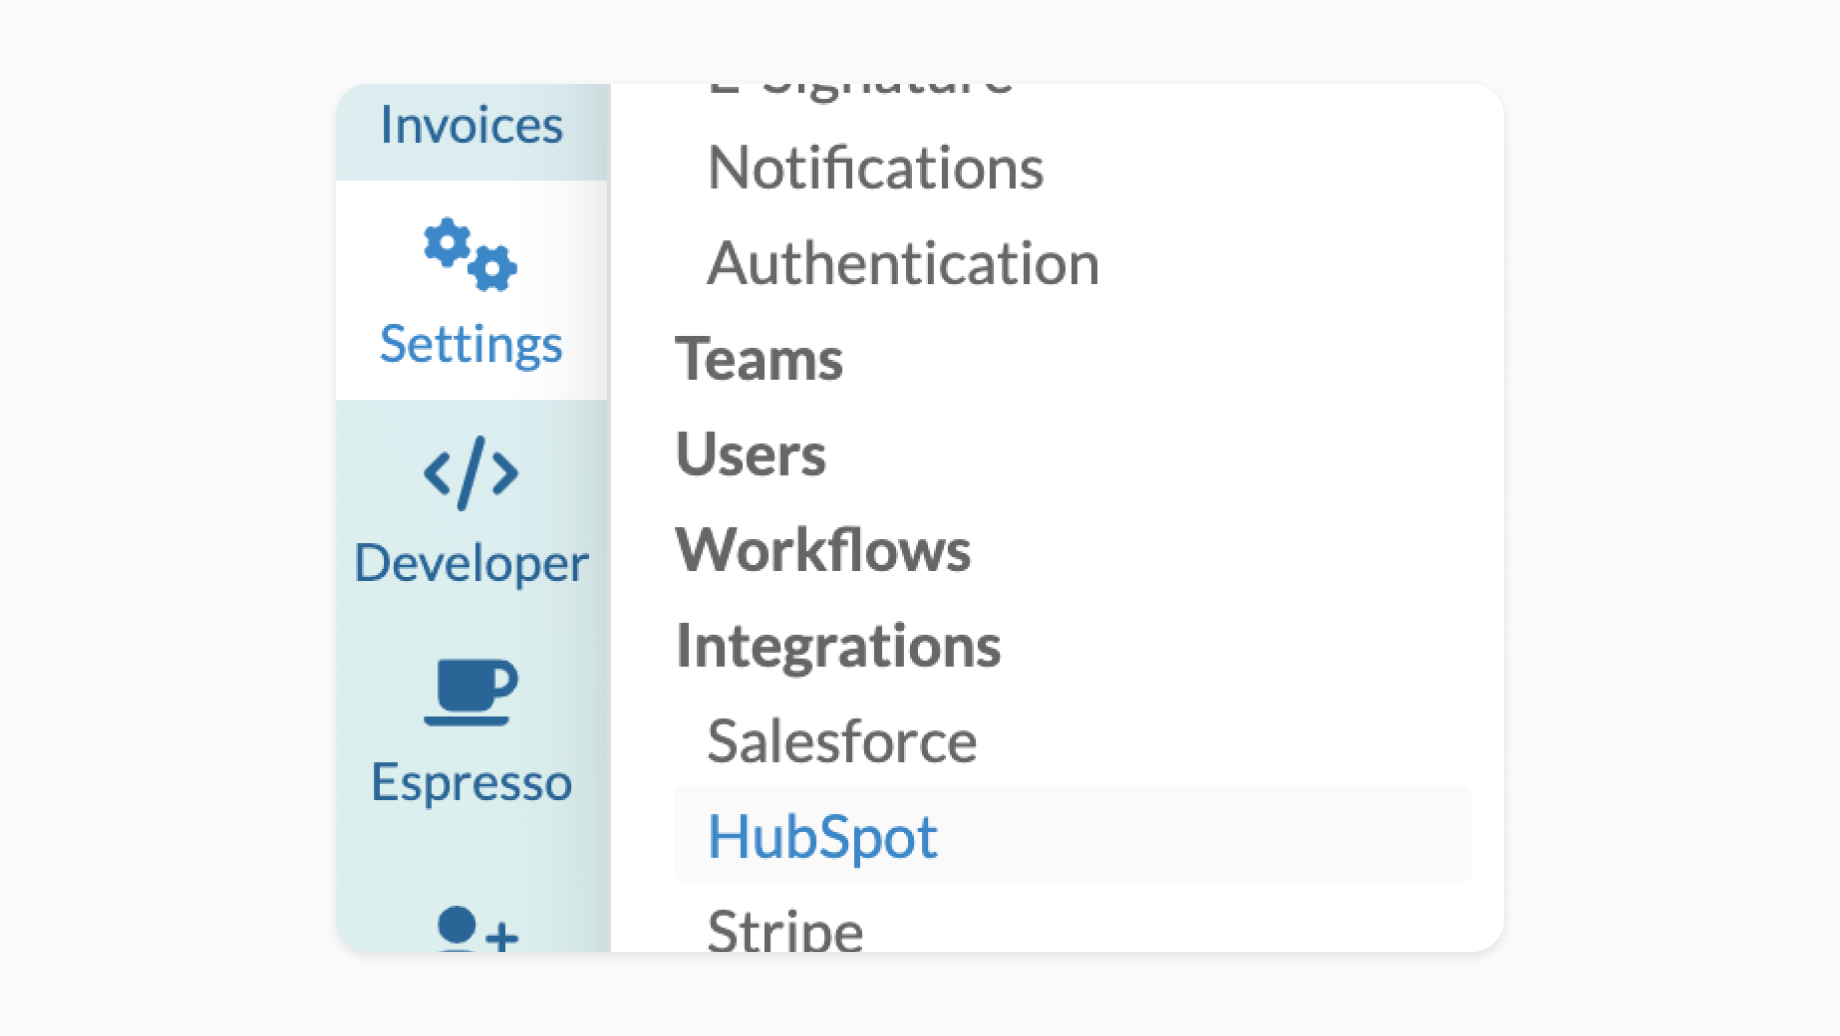
In RevOps, you can start connecting to HubSpot by going to the HubSpot Integrations page:
- This could be found by going to Settings > Integrations
- Or by going directly to Settings > Integrations > HubSpot
Click on the "Connect to HubSpot" button and authenticate into your HubSpot account. You can also connect to HubSpot on the dedicated HubSpot Settings page.
Click on the "Connect to HubSpot" button and authenticate into your HubSpot account. You can also connect to HubSpot on the dedicated HubSpot Settings page.
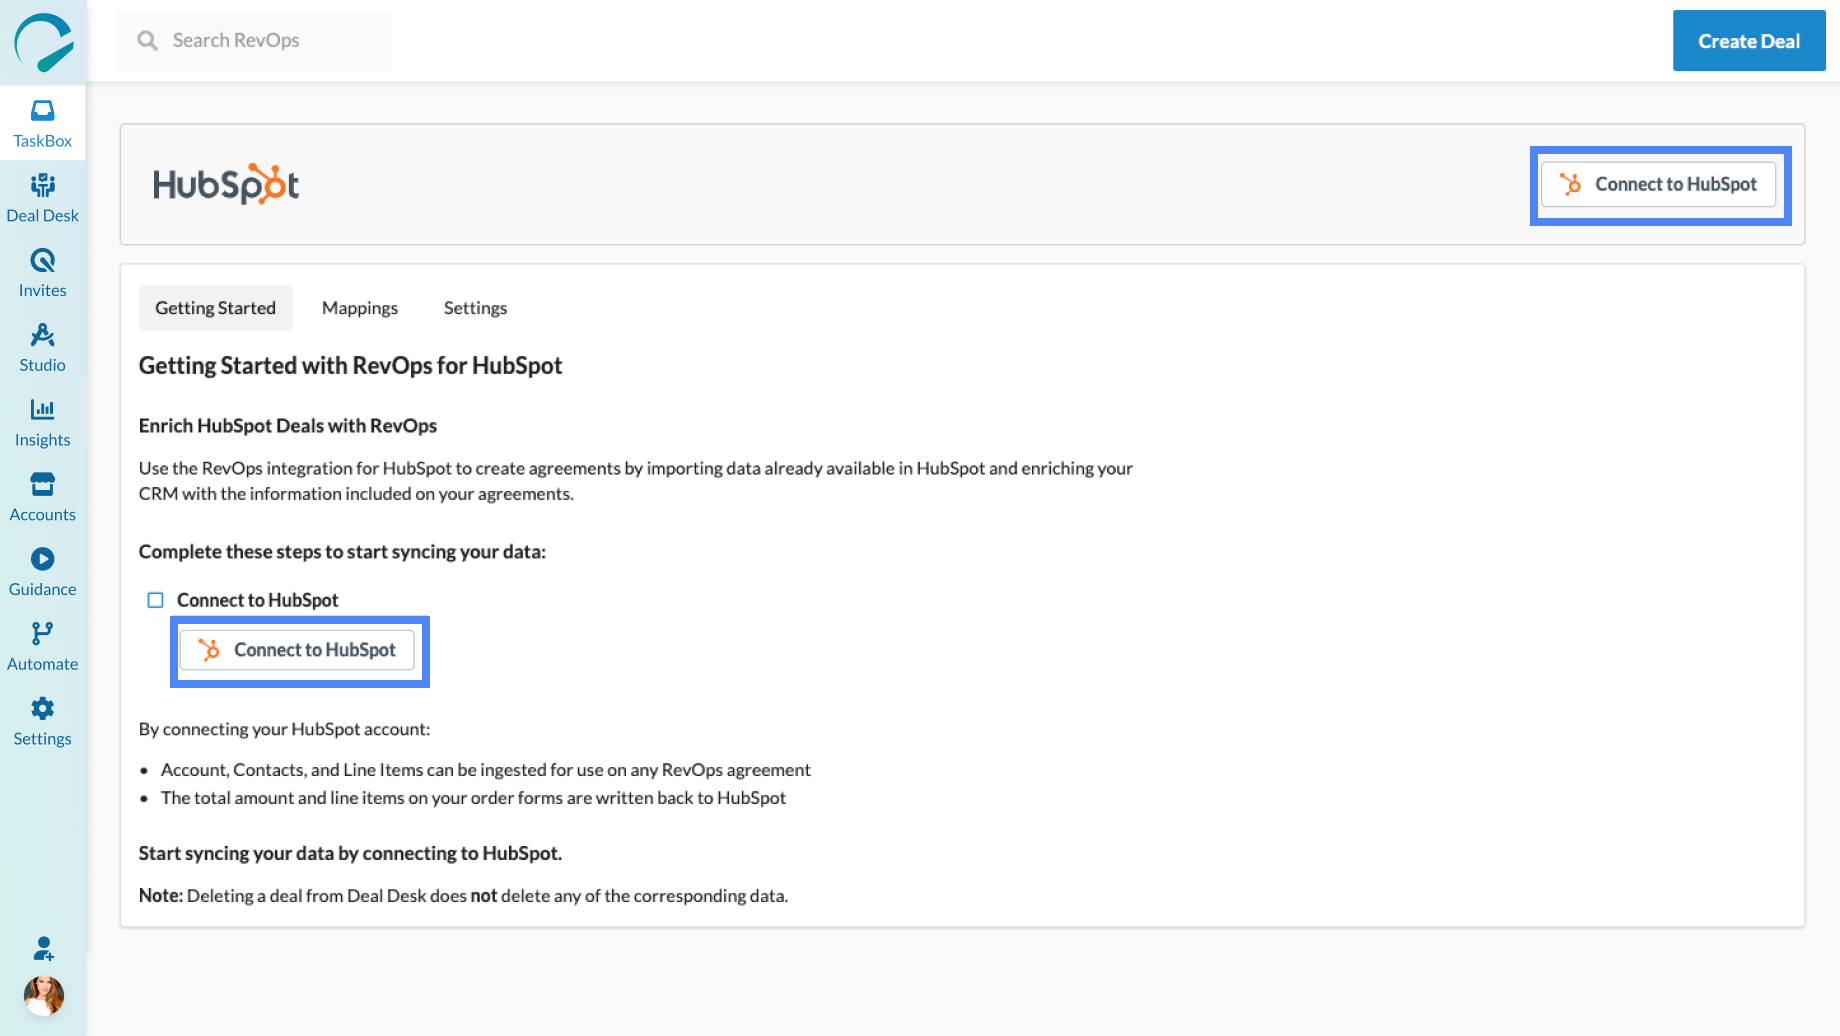
Blue boxes highlight the "Connect to HubSpot" button on the HubSpot Integration Settings page.
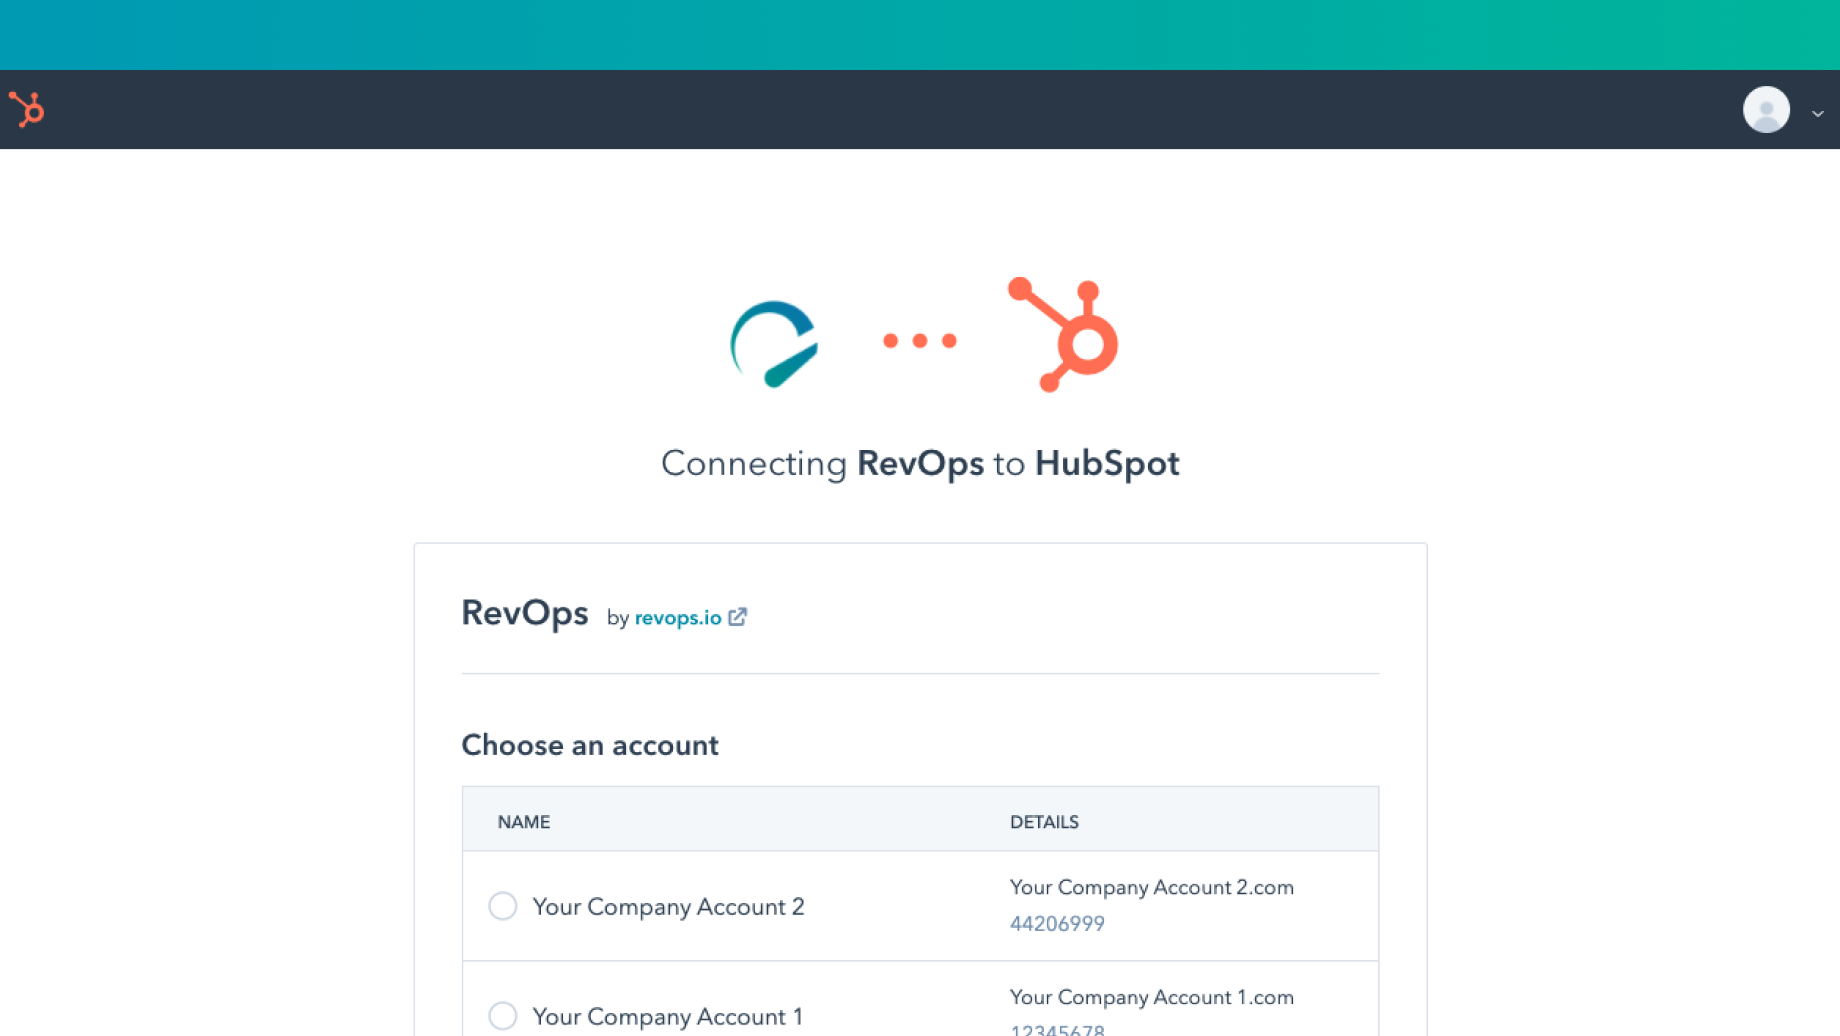
2. Pick an Account
When authenticating with HubSpot, you will be prompted to select the HubSpot account you would like to connect with.
Sandbox Mode
If you have a Sandbox environment that you would like to try this integration with, feel free to select that Account. You can always disconnect and move the integration to another HubSpot account later.
Caveats
RevOps production mode and RevOps sandbox mode can be connected to separate accounts or to the same account. If the same account is connected to both production mode and sandbox mode, features relying on webhooks to operate will not be supported in sandbox mode including CRM cards.
3. Accept Permissions
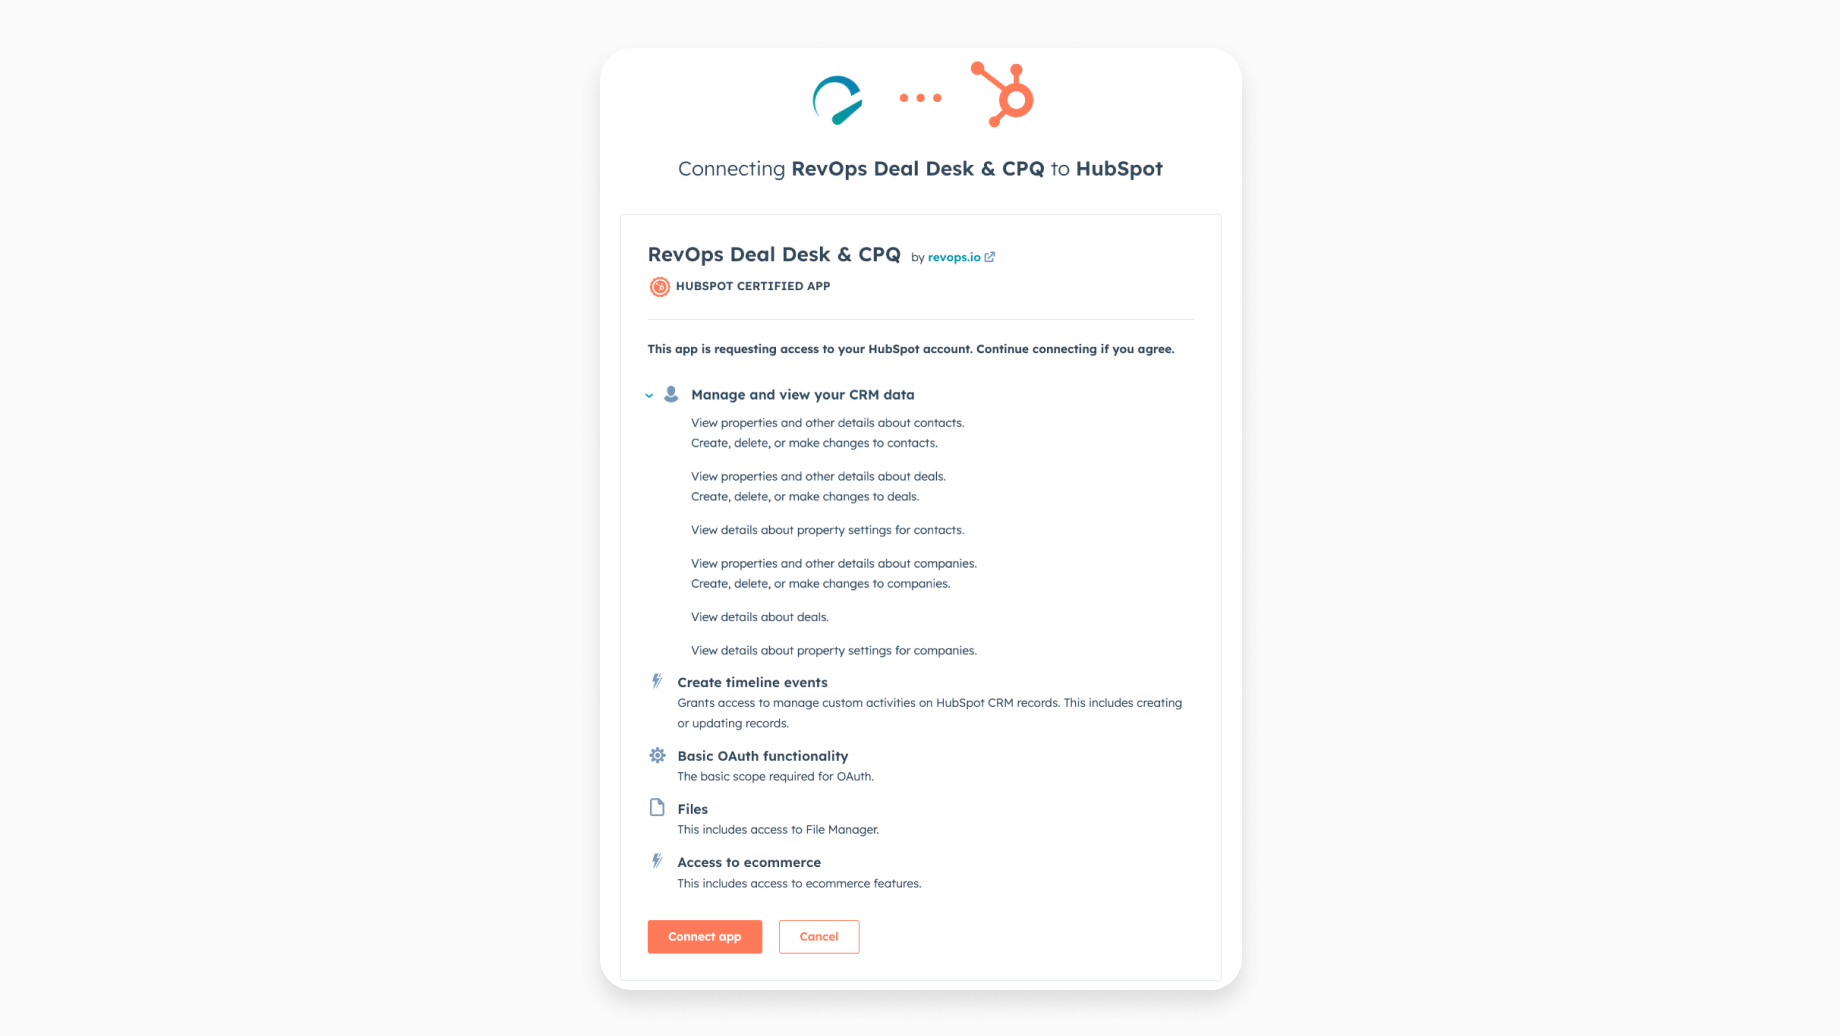
After selecting your desired account, you will see a list of permissions we need for the integration to run successfully, like the one below. Use the "Connect App" button, if the permissions are permissible, to finishing connecting RevOps to HubSpot.
4. Configure HubSpot Cards
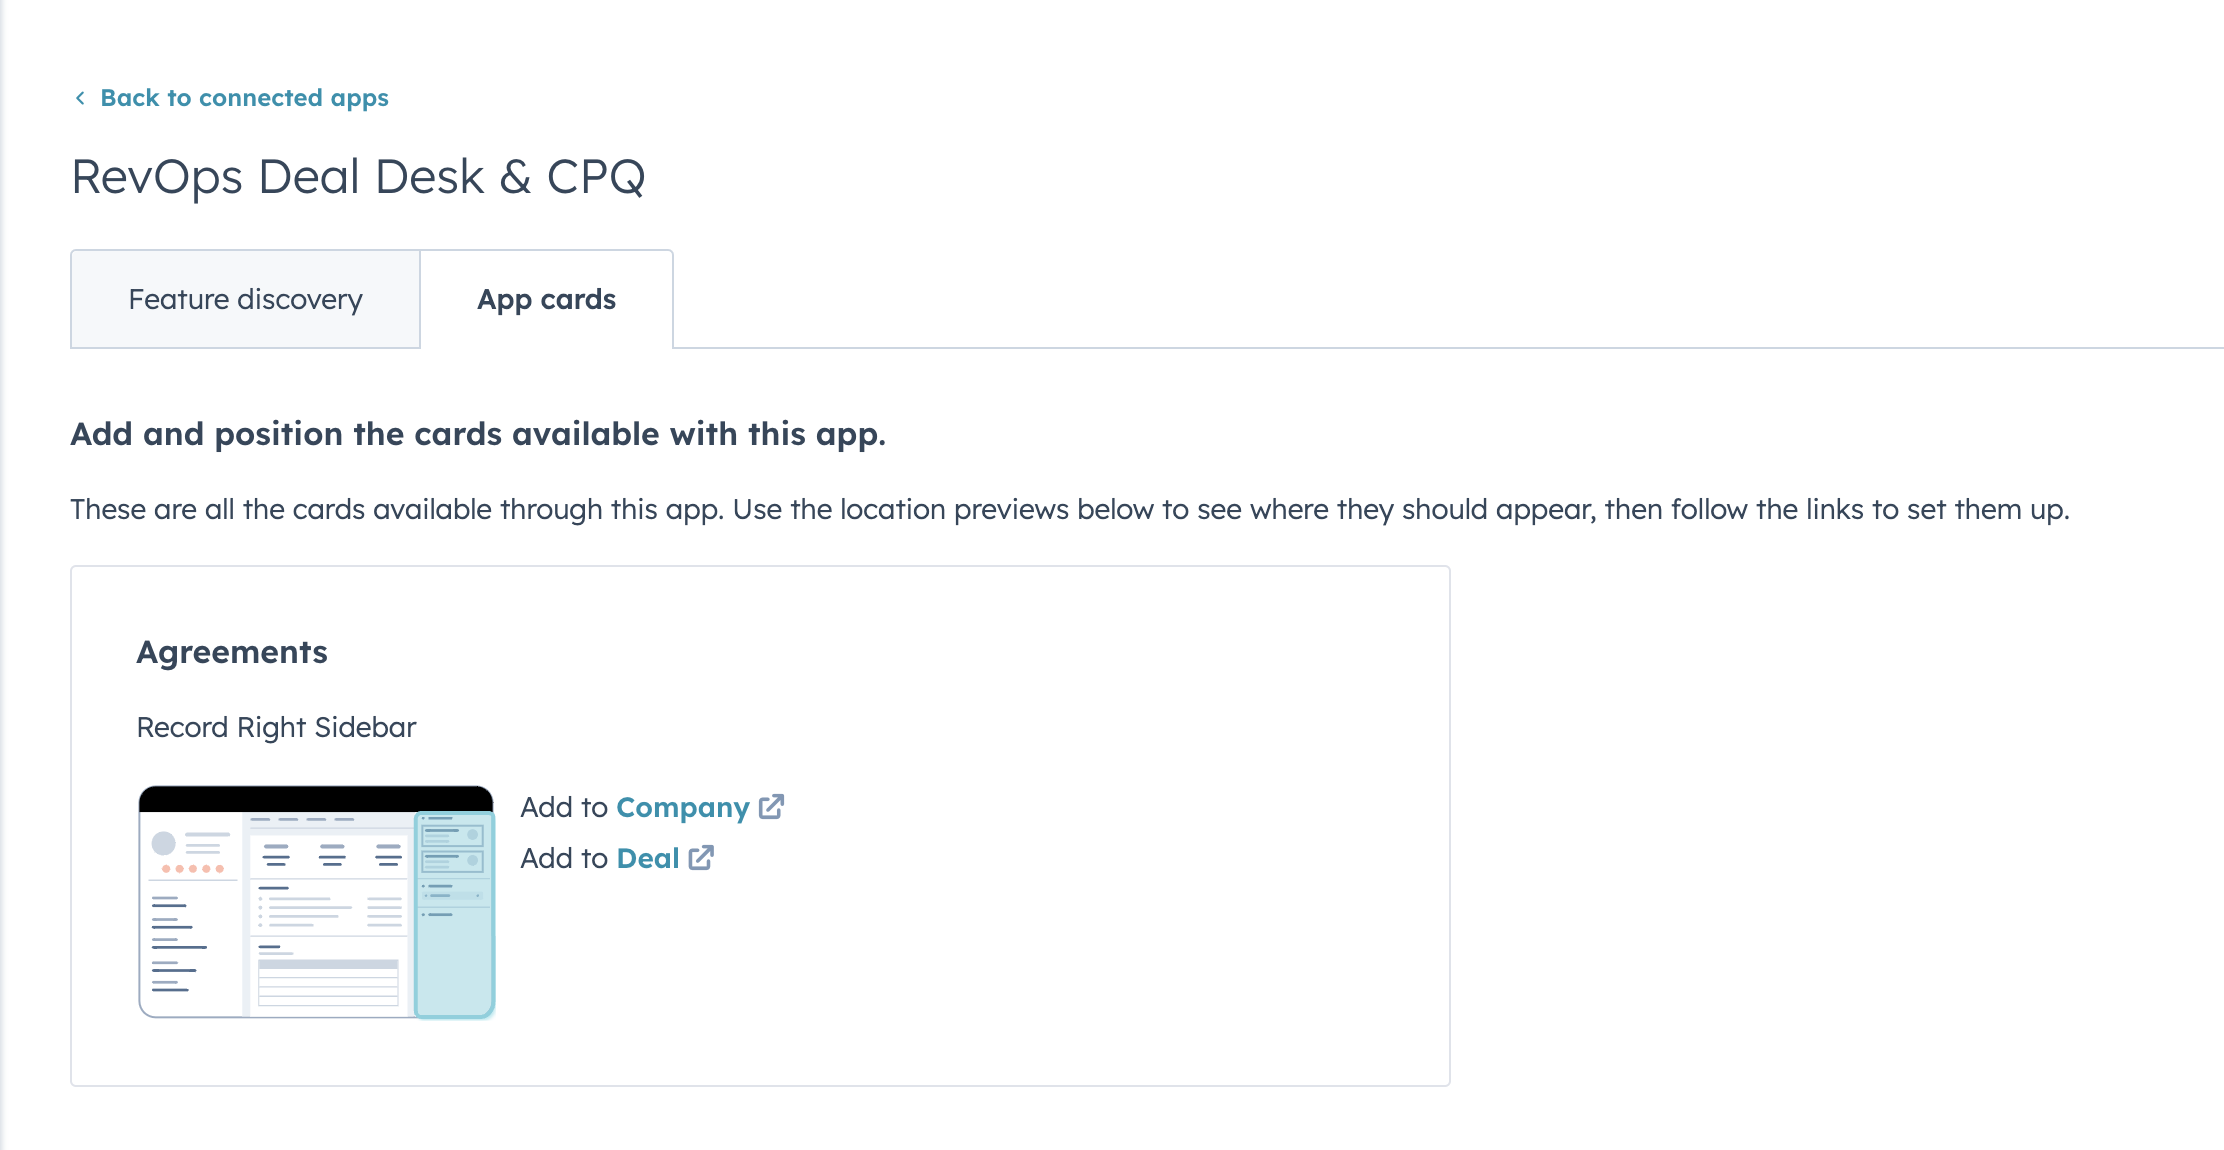
After RevOps is connected to HubSpot, you should configure HubSpot to display the RevOps cards. Cards can be added to the Deal and Company records.
Record Customization
1. Locate App Configuration
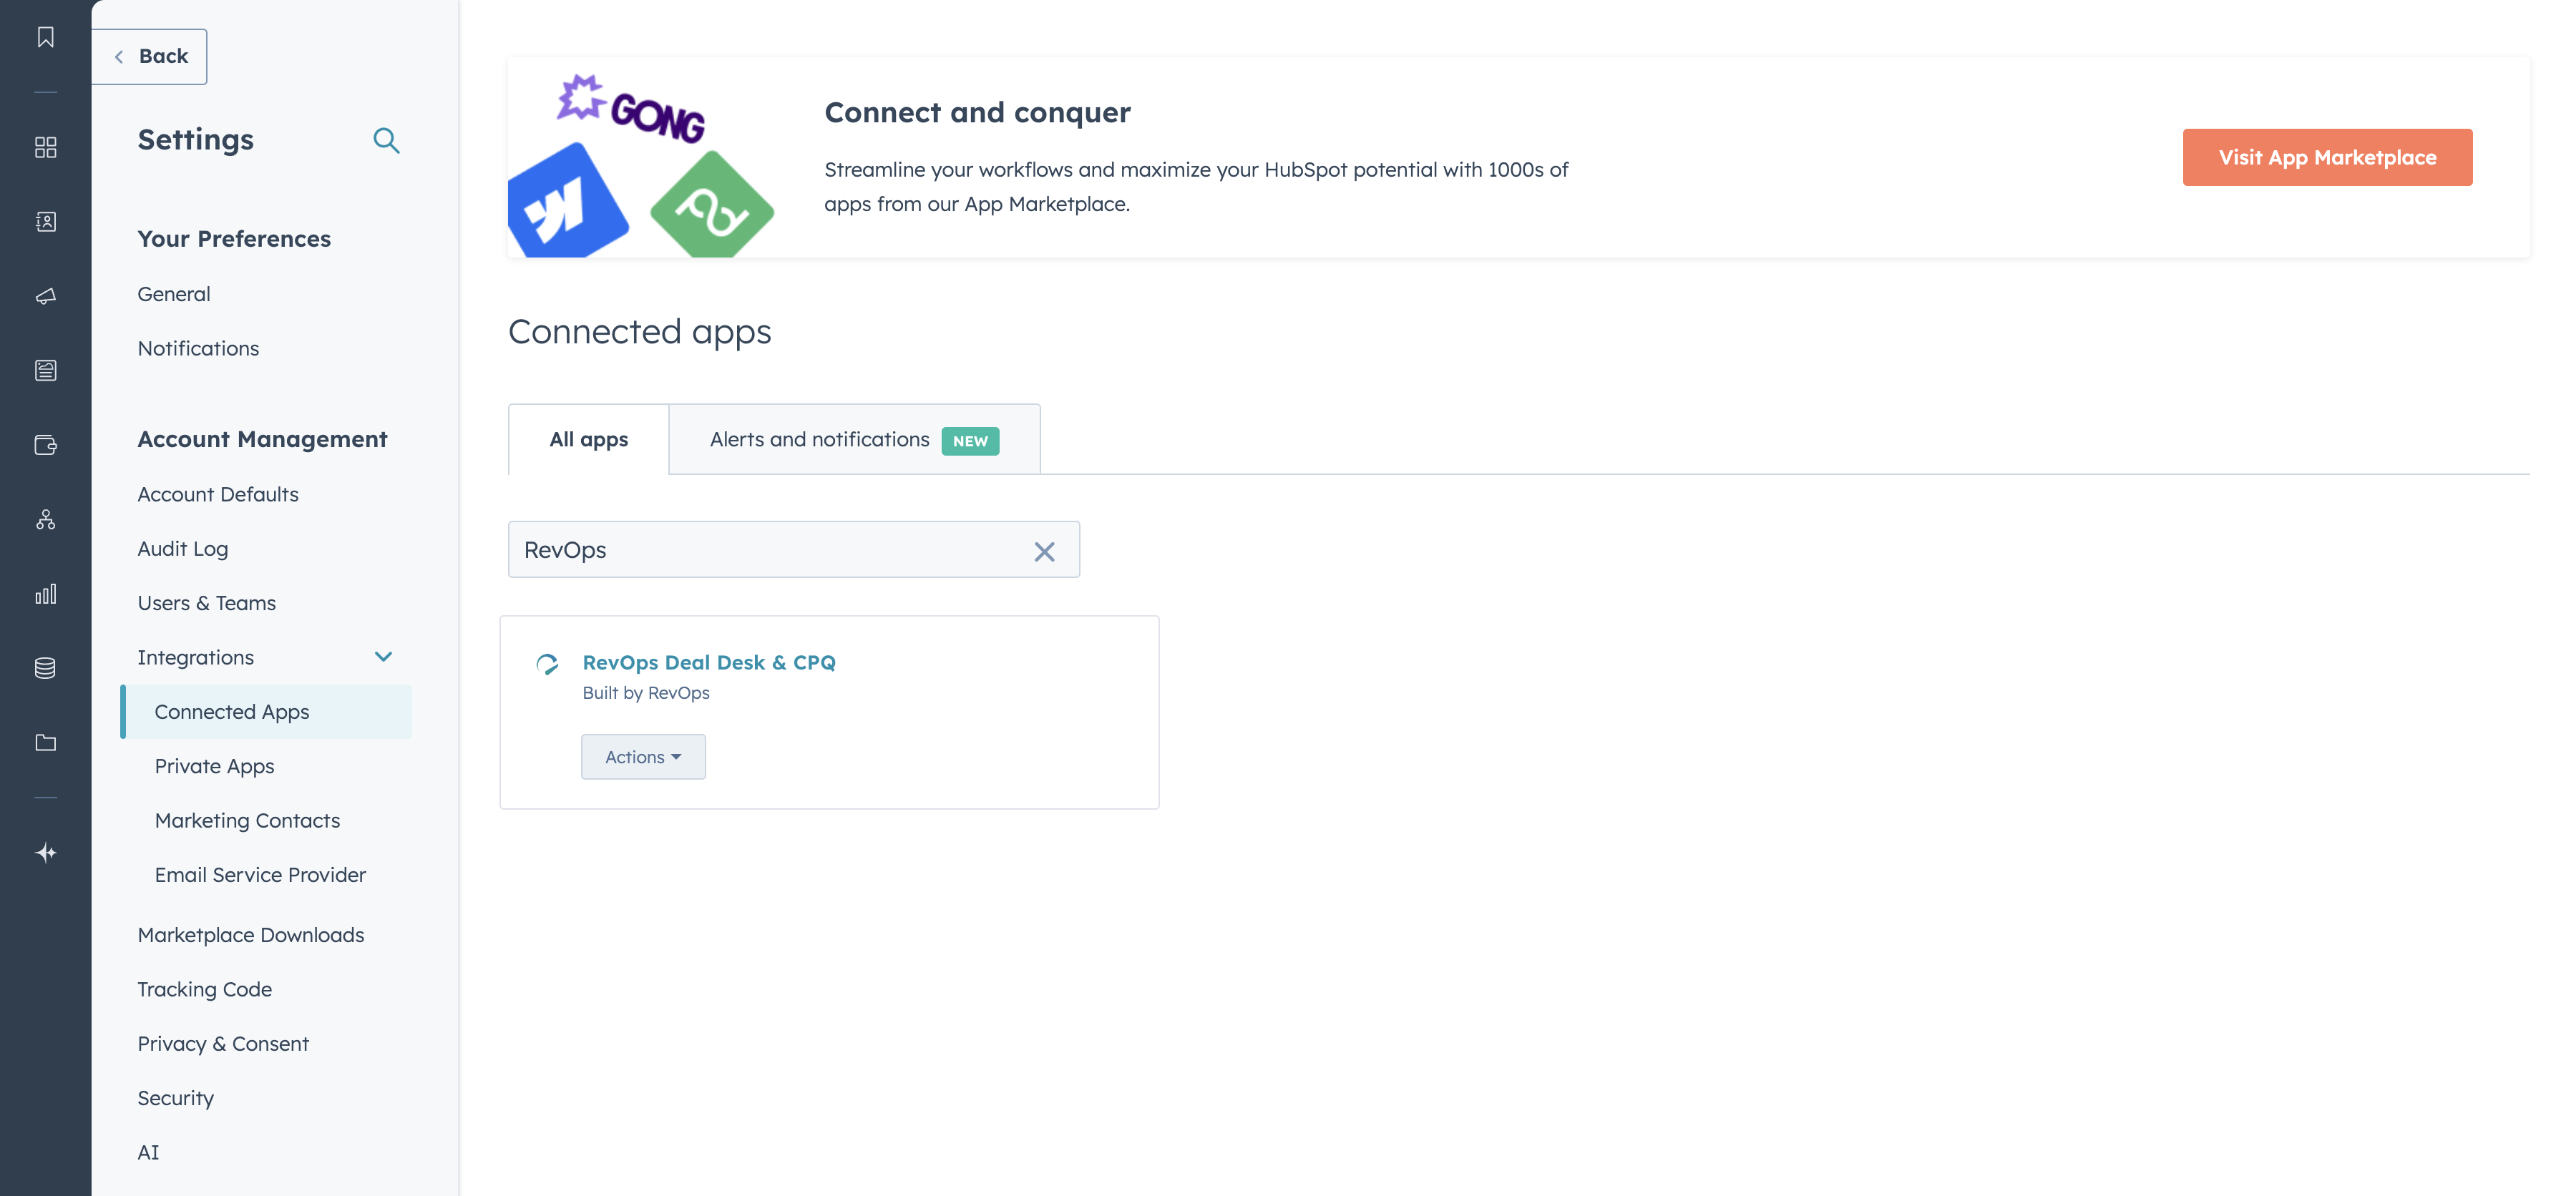
Log in to HubSpot and navigate to settings. Search for RevOps under Settings > Integrations > Connected Apps and select the app.
Select the object that you would like to add a card to. You'll repeat the following steps for each object.
2. Add RevOps Card
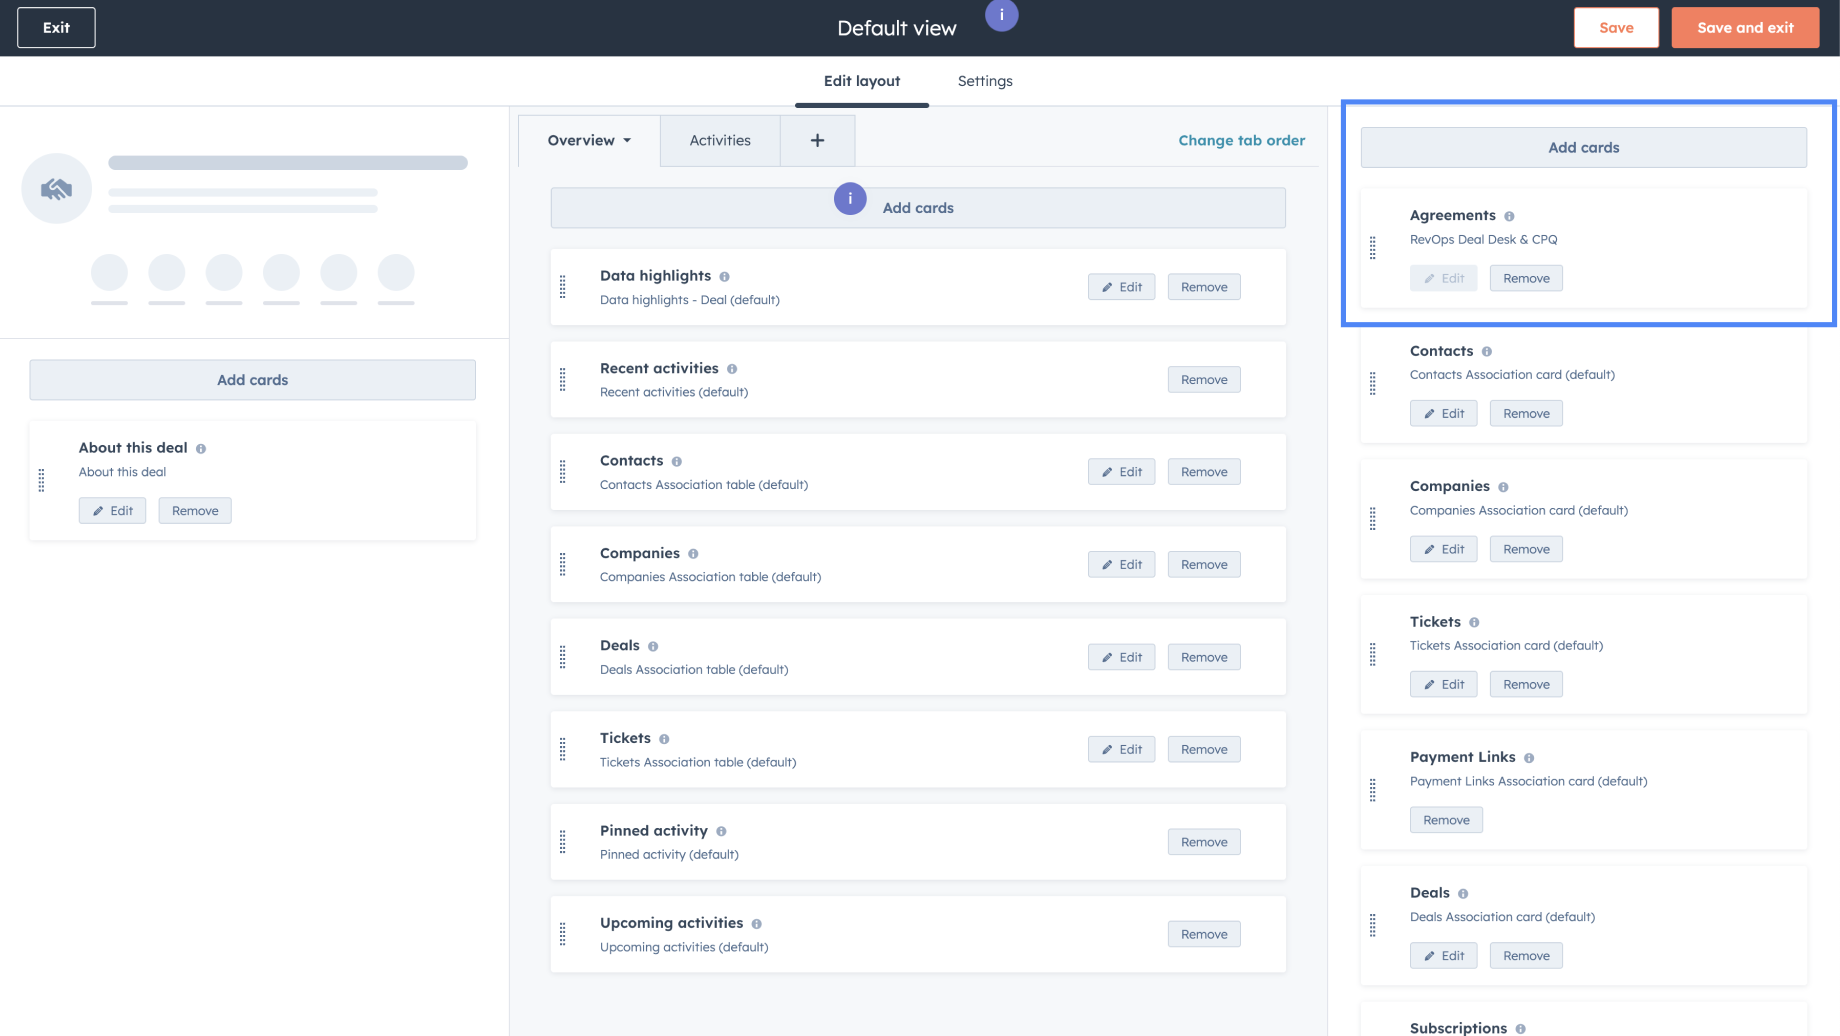
Edit the default view and click on Add cards to include new cards in the view. Search for RevOps from the list of available cards and add RevOps Deal Desk & CPQ card. We recommend moving the card to the top of the view and saving the new view.
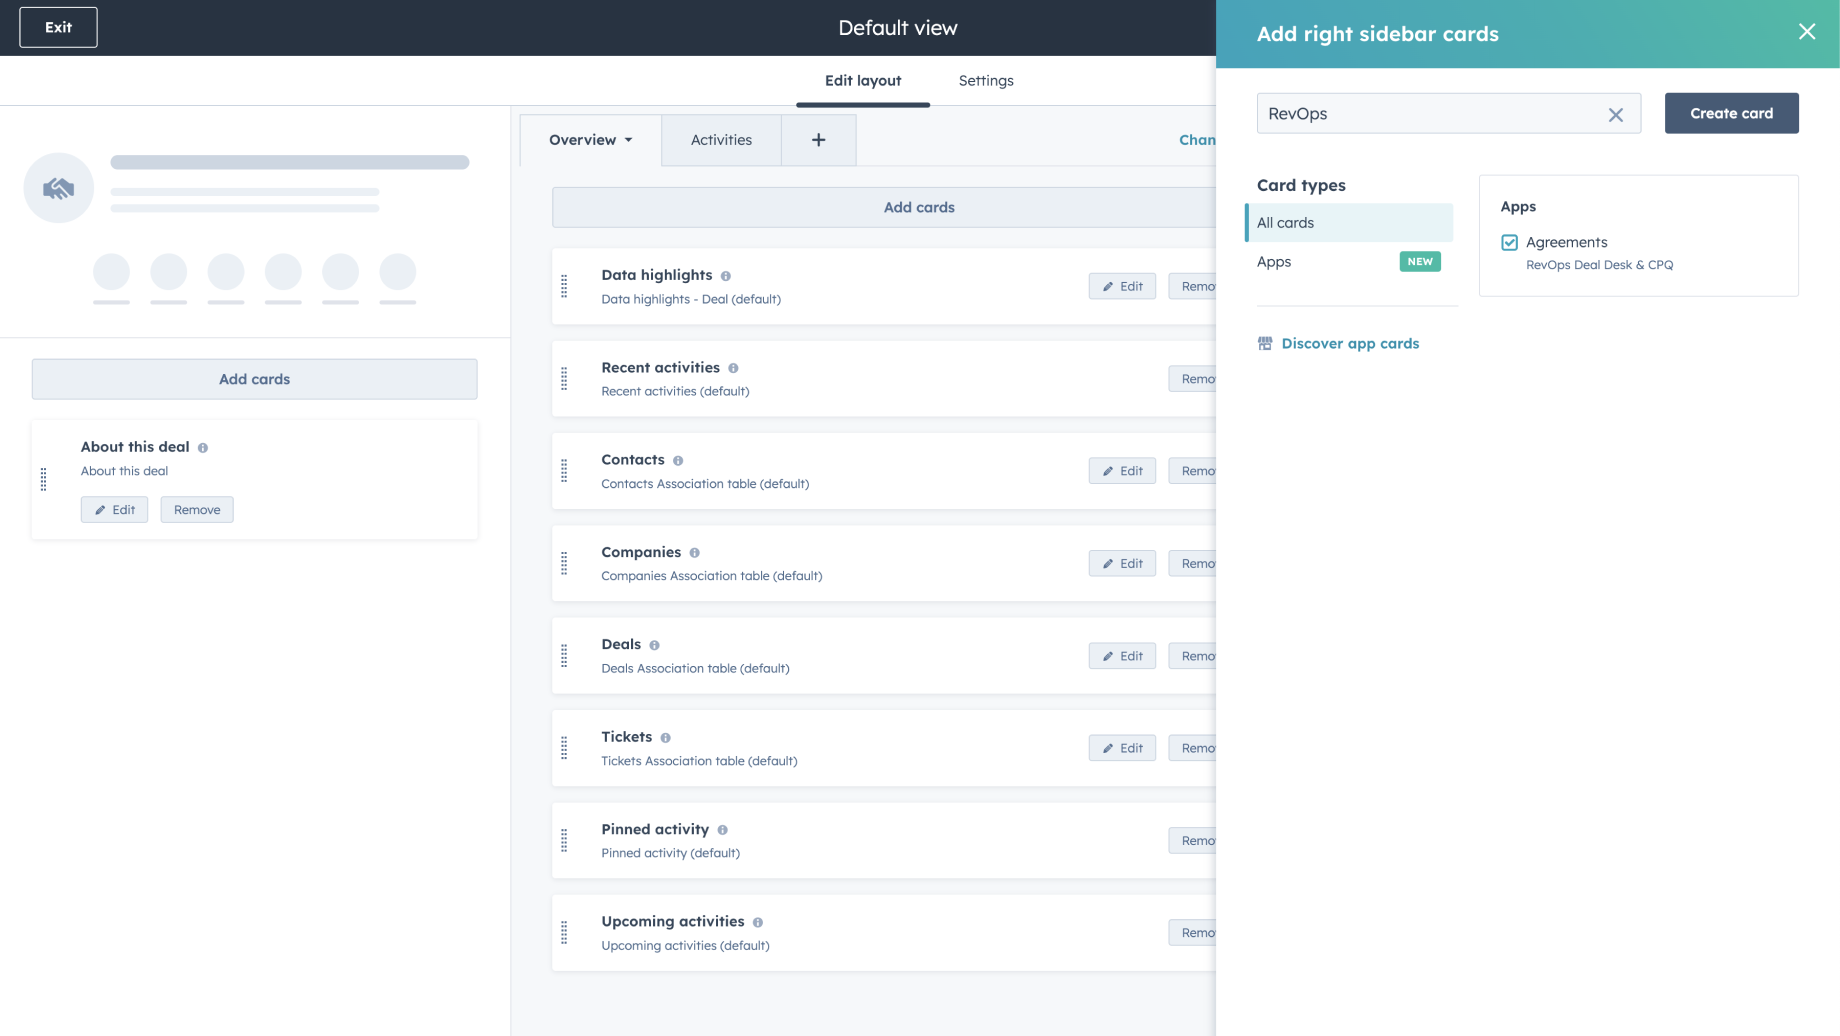
If you have the legacy RevOps card enabled, we recommend disabling it. All previous functionality is available in the new cards. The legacy cards will be removed for all portals in the future.
3. Confirm Card View
After the default view has been updated and saved, confirm that the RevOps Deal Desk & CPQ Card is visible by navigating to a test Deal in HubSpot. You should see a card similar to the following:
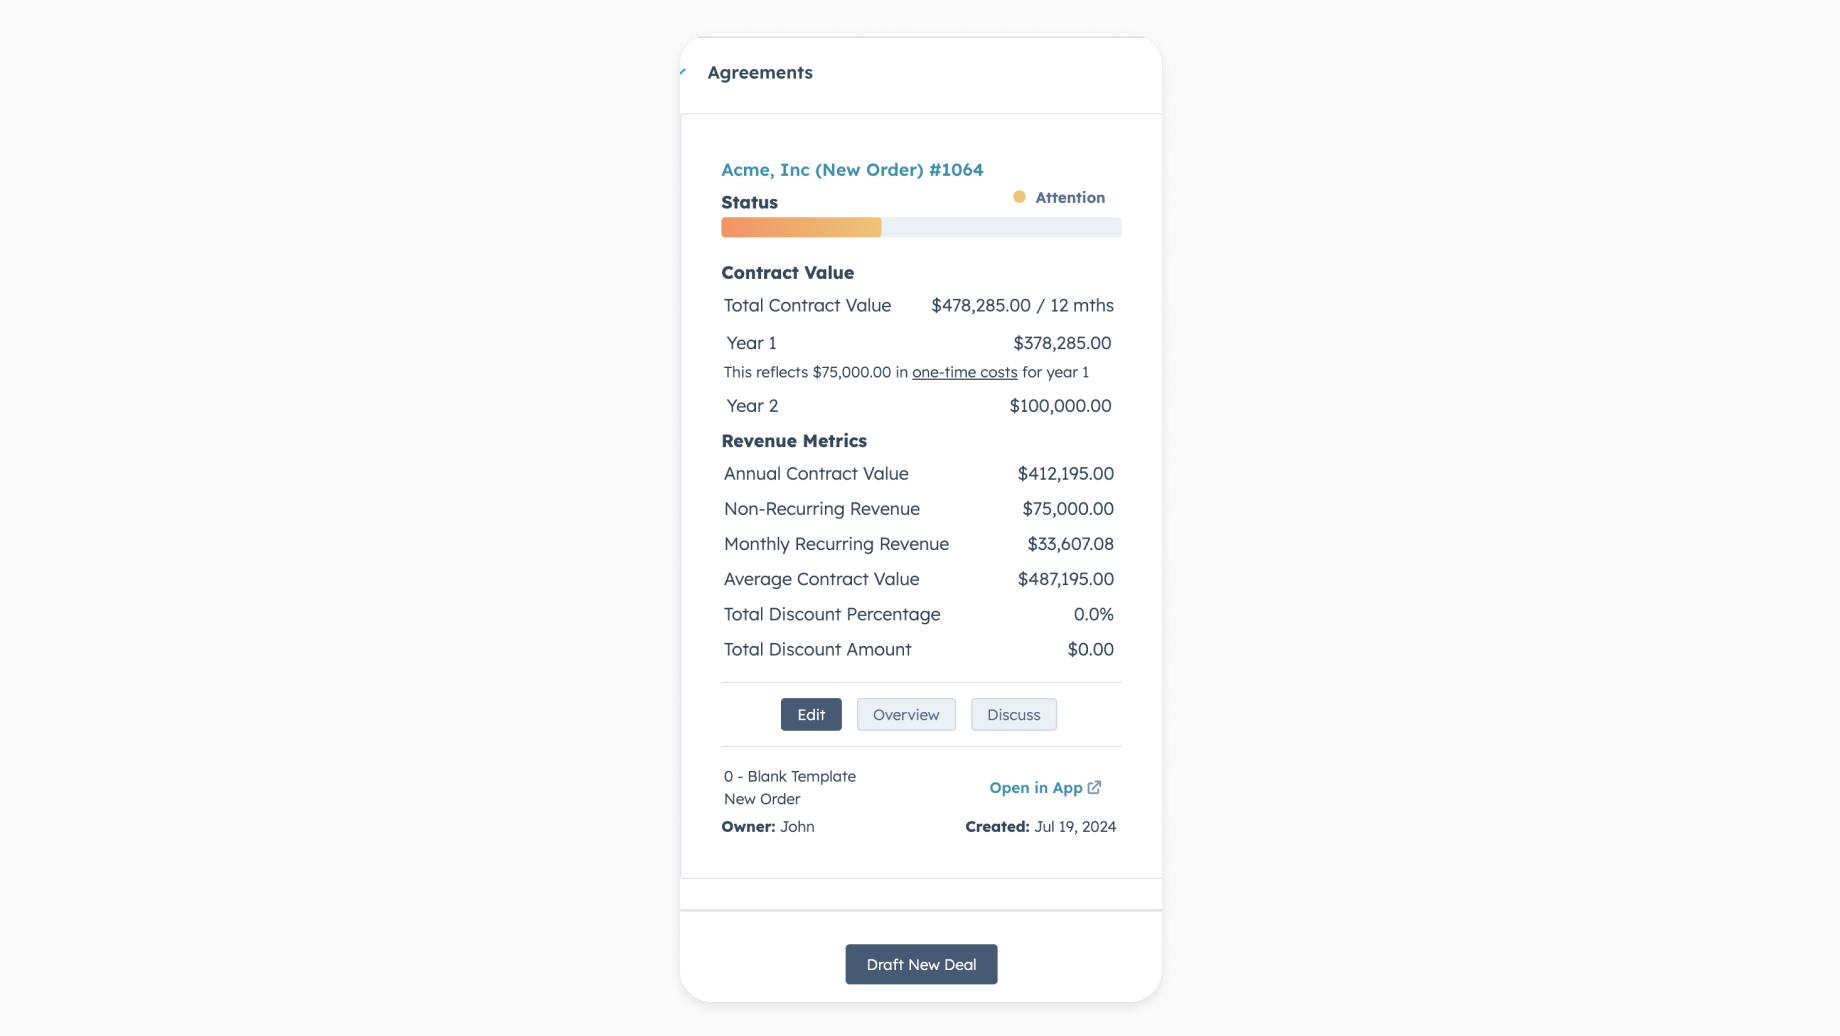
If you have user customization enabled for your views, your sidebar positioning may not match the global configuration and may need to be re-ordered.
Celebrate! 🎉
Congratulations! Once you've completed all the steps to connecting RevOps with HubSpot, you're now able to create RevOps Deals directly in HubSpot as well as synchronize data between the two tools.
How does data sync between RevOps & HubSpot?
When your RevOps deal is first associated with the HubSpot deal, RevOps will import:
- The contacts on the HubSpot deal.
- The addresses associated with the Account on the HubSpot deal.
- The line items on the HubSpot deal (as custom line items in RevOps). Every time you save or submit the deal for approval, RevOps will also synchronize the updated data for the above fields back to HubSpot.
📄️ Creating Deals in HubSpot
This article assumes that your RevOps account is already connected to HubSpot. If you need help connecting your RevOps account to HubSpot, take a look at this guide.
📄️ Importing Customer Information
When the RevOps deal is first associated with the HubSpot deal, RevOps will import the following information related to your customer:
📄️ RevOps Subscriptions
Overview
📄️ Disconnecting the HubSpot Integration from RevOps
To disconnect your HubSpot account from RevOps, head over to the HubSpot settings page and click 'Remove Connection.'
📄️ Syncing RevOps Data to HubSpot
Built-In Mappings
📄️ Syncing Line Items between HubSpot and RevOps
Each time the RevOps deal is saved, line items on your deal will synchronize to HubSpot as custom line items on the associated HubSpot deal.