Getting Connected
To get connected to Chargebee, visit Settings > Integrations > Chargebee and select the "Connect to Chargebee" button.
We recommend first connecting your RevOps sandbox to a Chargebee sandbox.

This will prompt you to provide 2 API keys and your site name. After which you will configure a webhook.
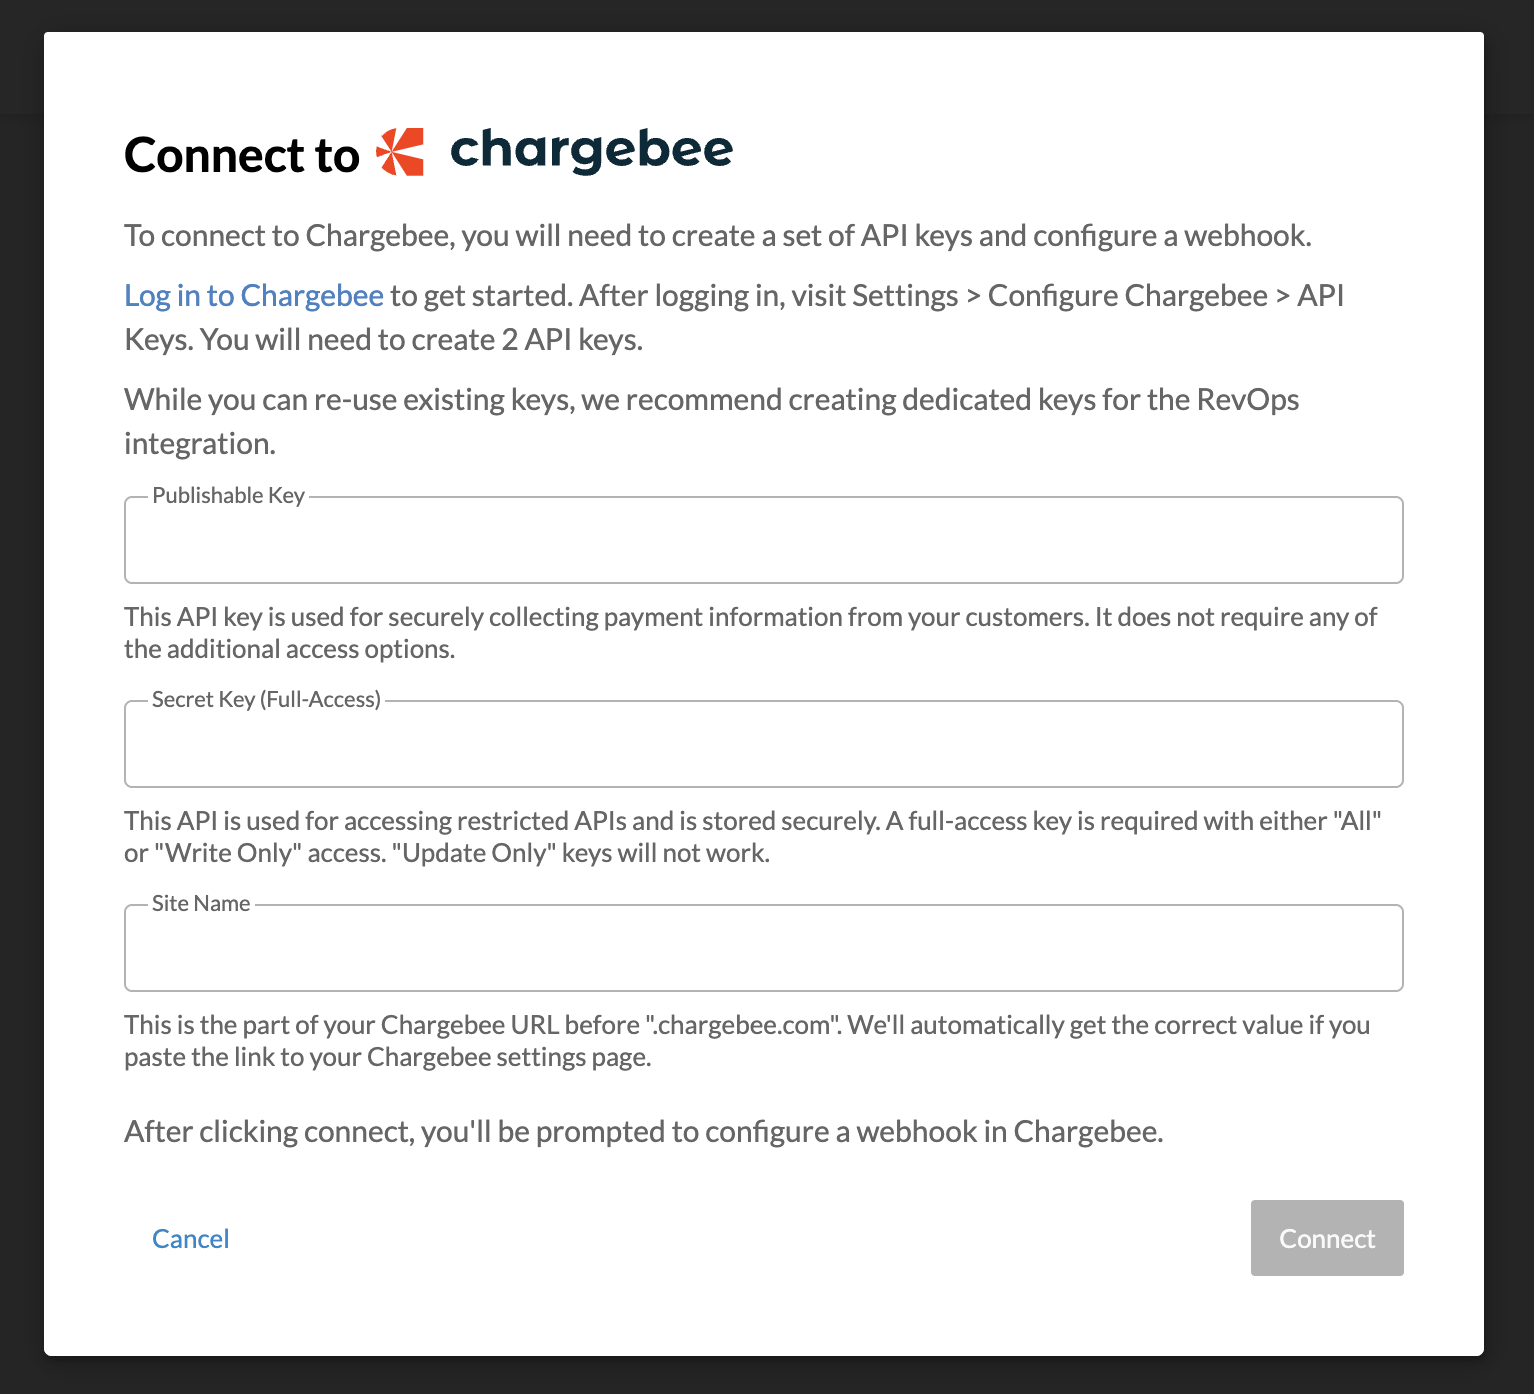
Connecting to Chargebee will have no impact until payment is enabled on a deal or template. Payment is disabled by default.
Completing these steps requires having administrator access to both RevOps and Chargebee.
Creating API Keys
You will need to provide 2 API keys from Chargebee. To create or manage API keys in Chargebee, visit Settings > Configure Chargebee > API Keys.

When creating API keys, they should match the following configurations.
| Publishable Key | Secret Key |
|---|---|
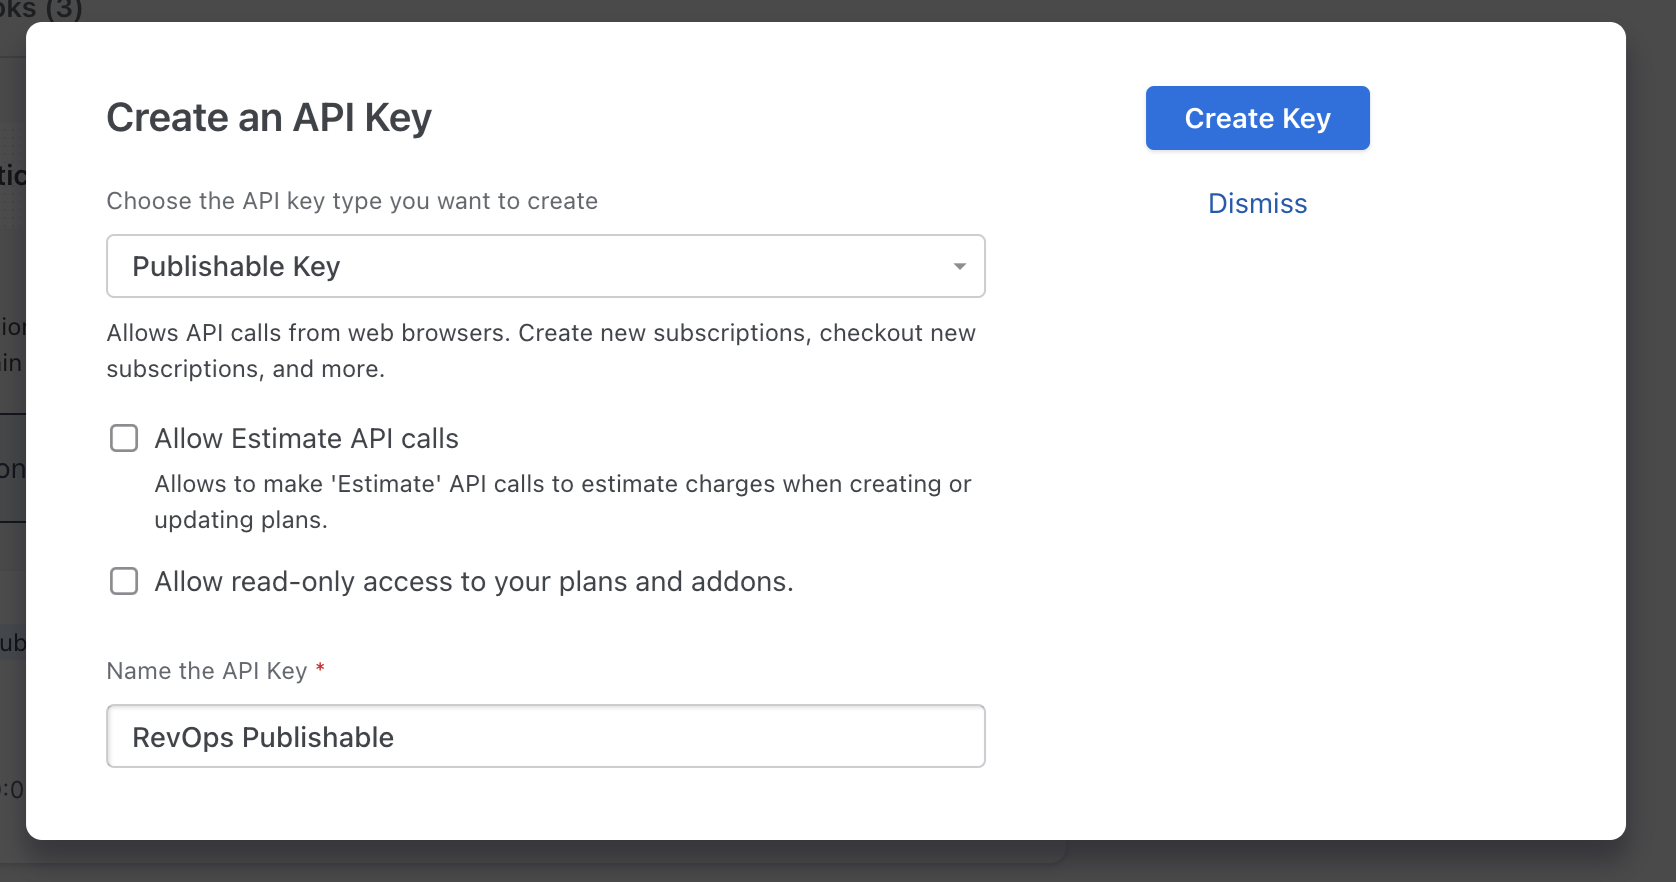 | 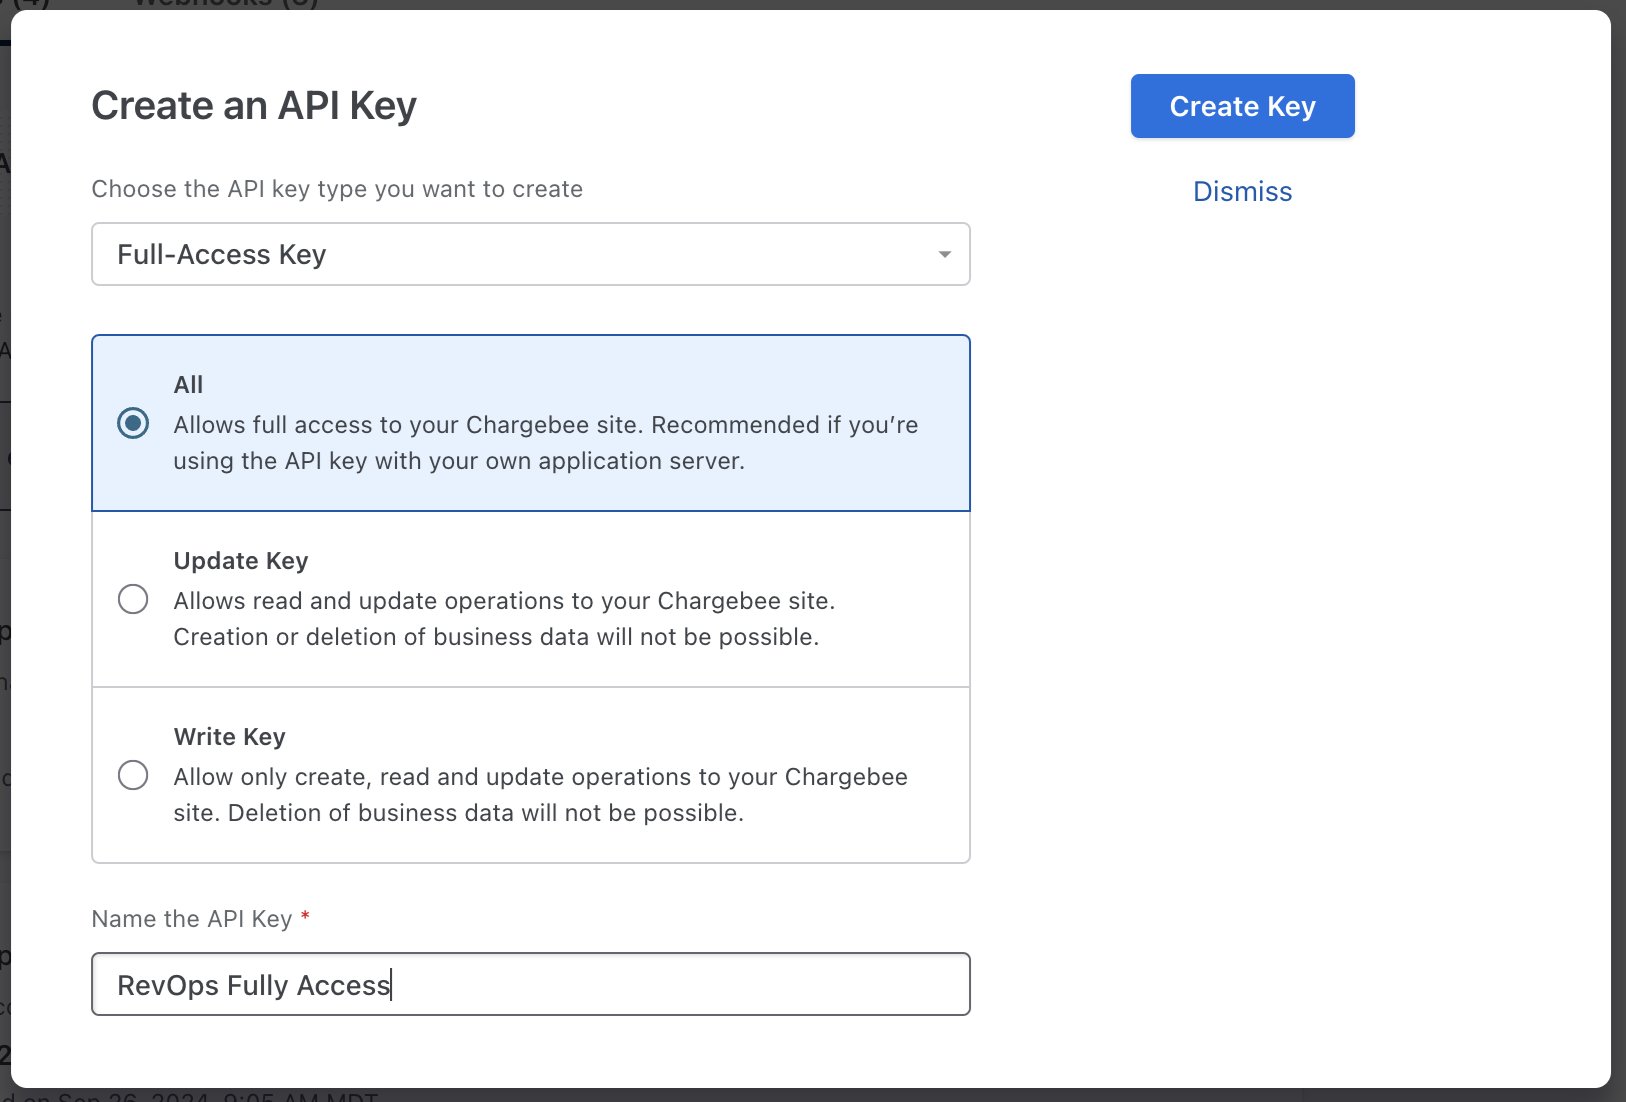 |
While you can use existing keys, we recommend creating dedicated keys for the RevOps integration. This will show RevOps as the user when reviewing audit logs and is a security best practice.
Site Name
Each Chargebee site has a unique site name that determines their URL. For instance, my-org-name uses https://my-org-name.chargebee.com.
When configuring this value, you may paste the URL to any Chargebee page such as https://my-org-name.chargebee.com/apikeys_and_webhooks/api. RevOps will automatically select the site name from the URL.
Saving Connection
When saving the connection, RevOps will perform basic checks to verify the credentials provide are valid.
Once connected, the connection cannot be removed or updated without contacting RevOps support.
Configuring Webhooks
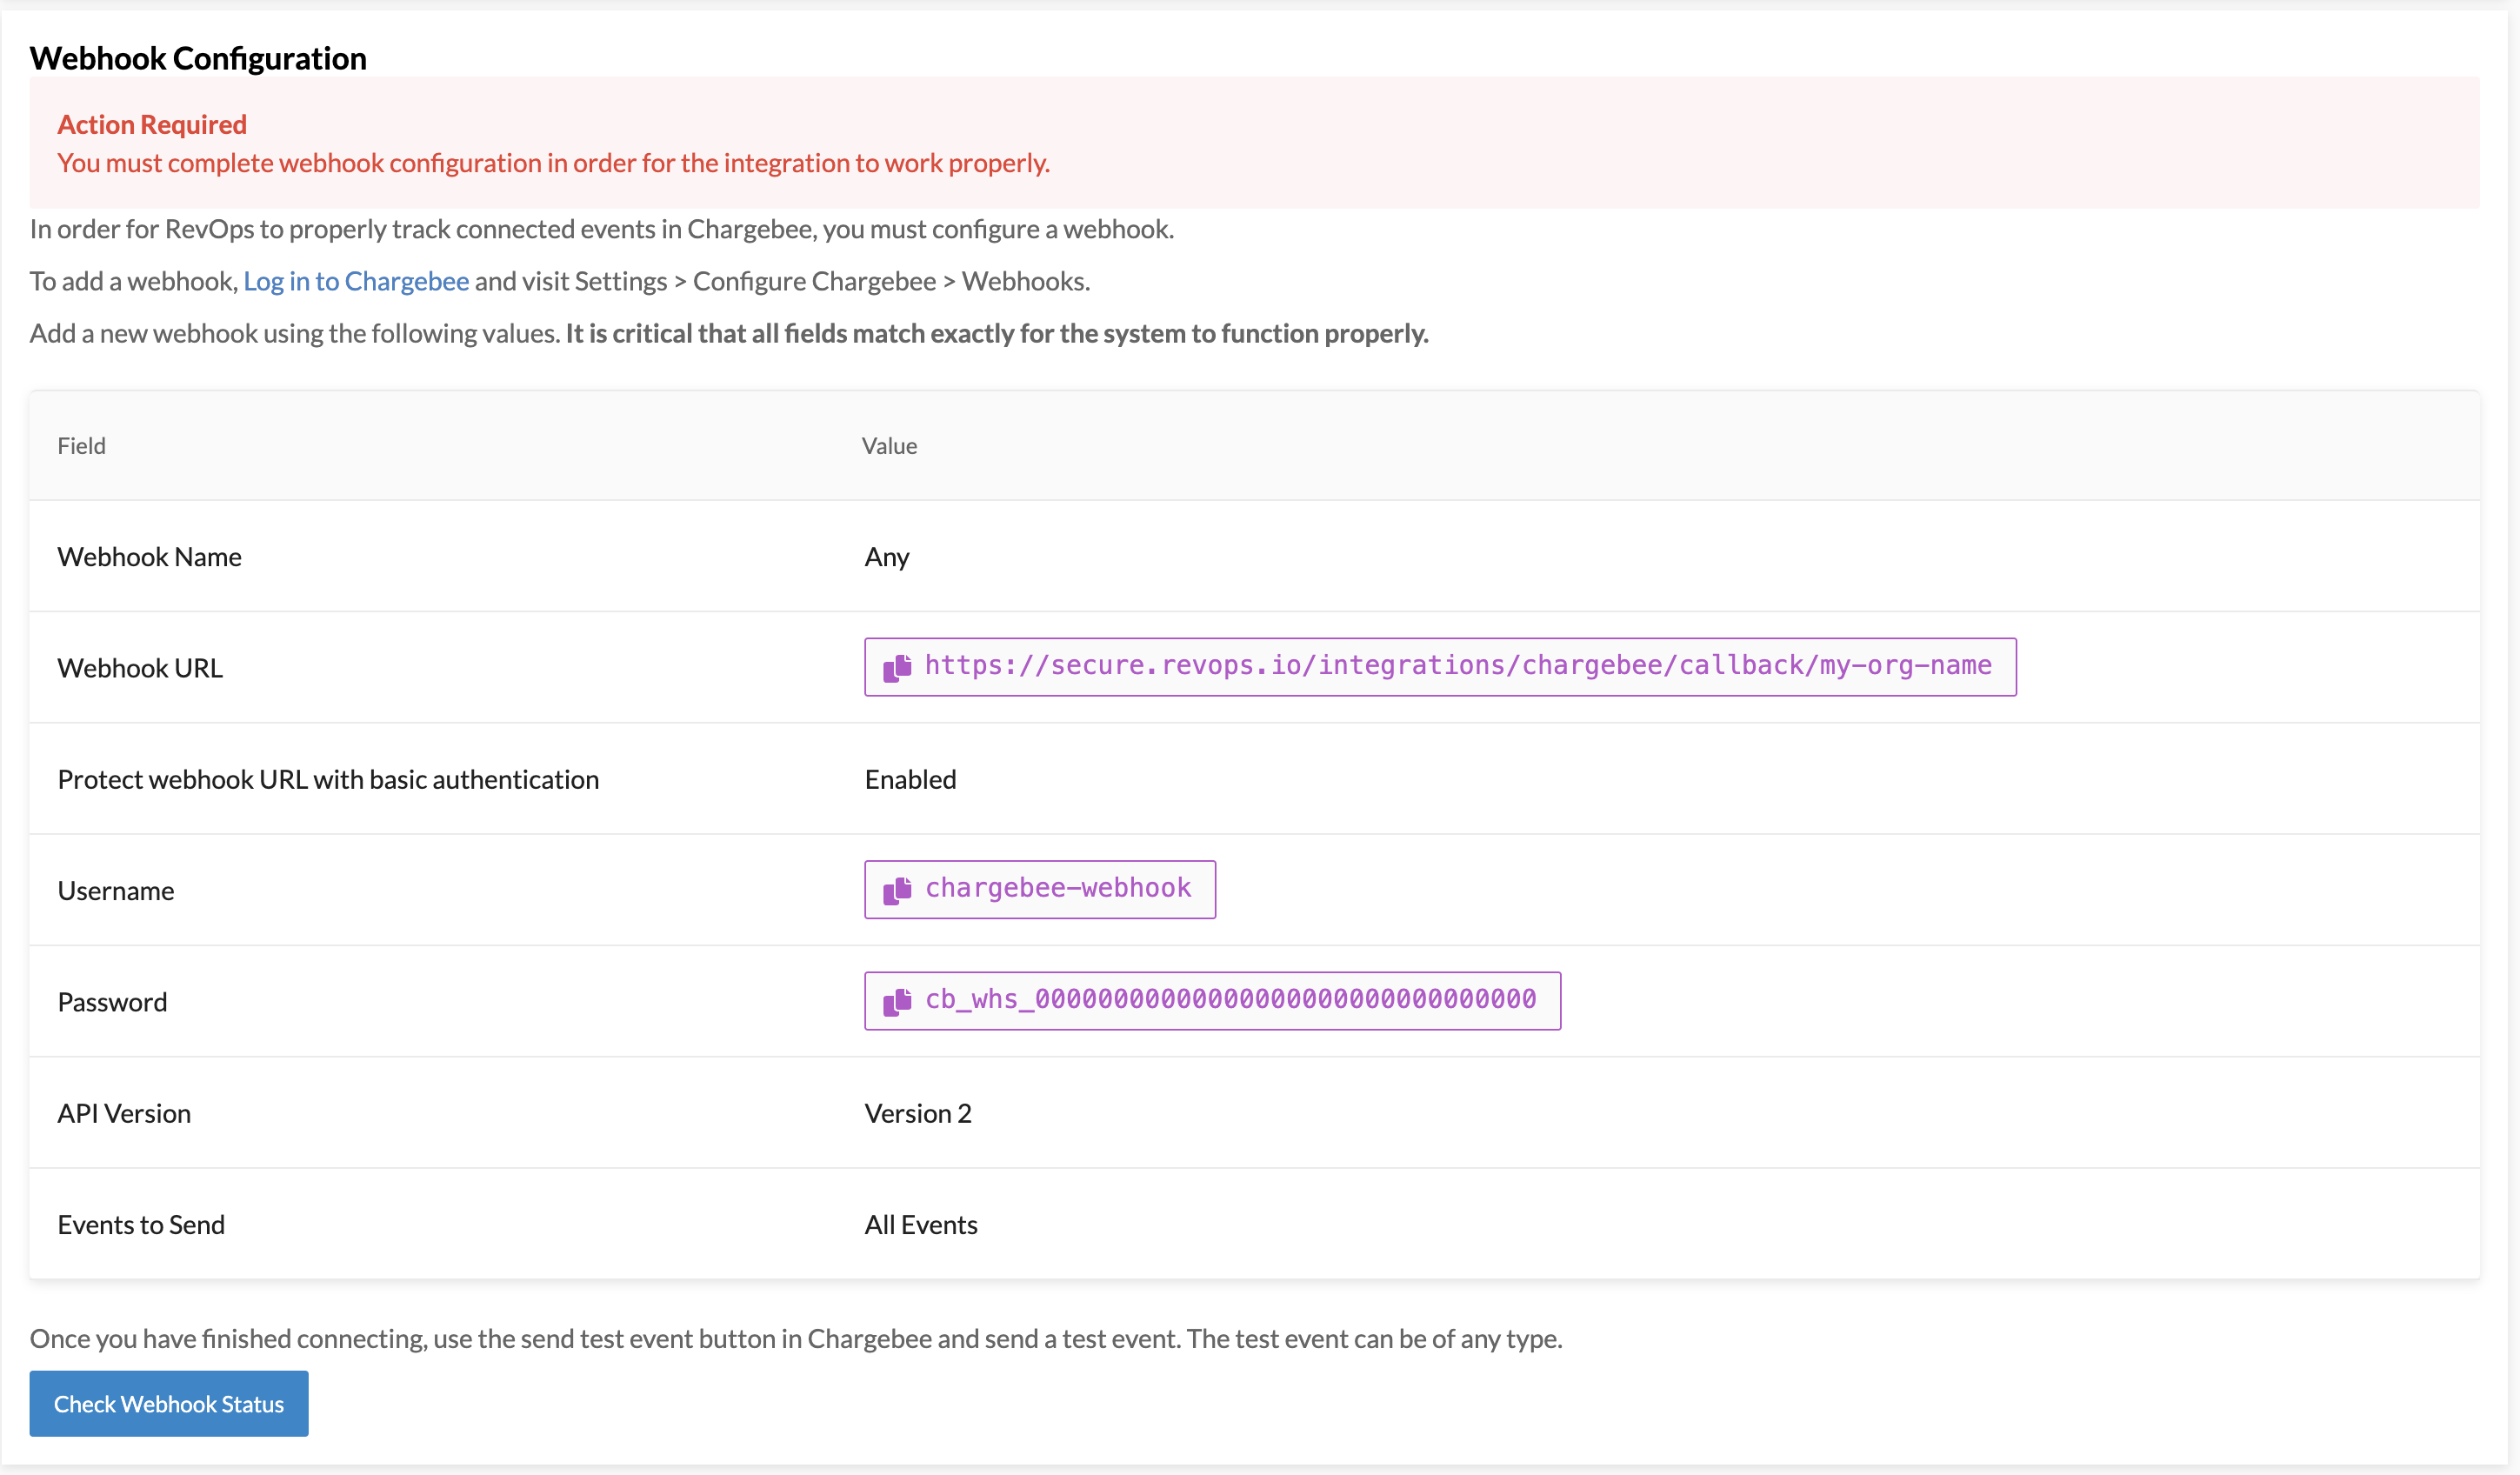
After connecting your Chargebee API keys, you will need to configure a webhook. This will ensure RevOps is up to date on any updates that occur in Chargebee.
While viewing Chargebee API keys, you can select the Webhooks tab to manage webhooks.

RevOps will display the appropriate value for each setting. It is critical that these values match identically.
Any settings that are not listed in the table do not impact the integration and can use any value.
| RevOps | Chargebee |
|---|---|
 | 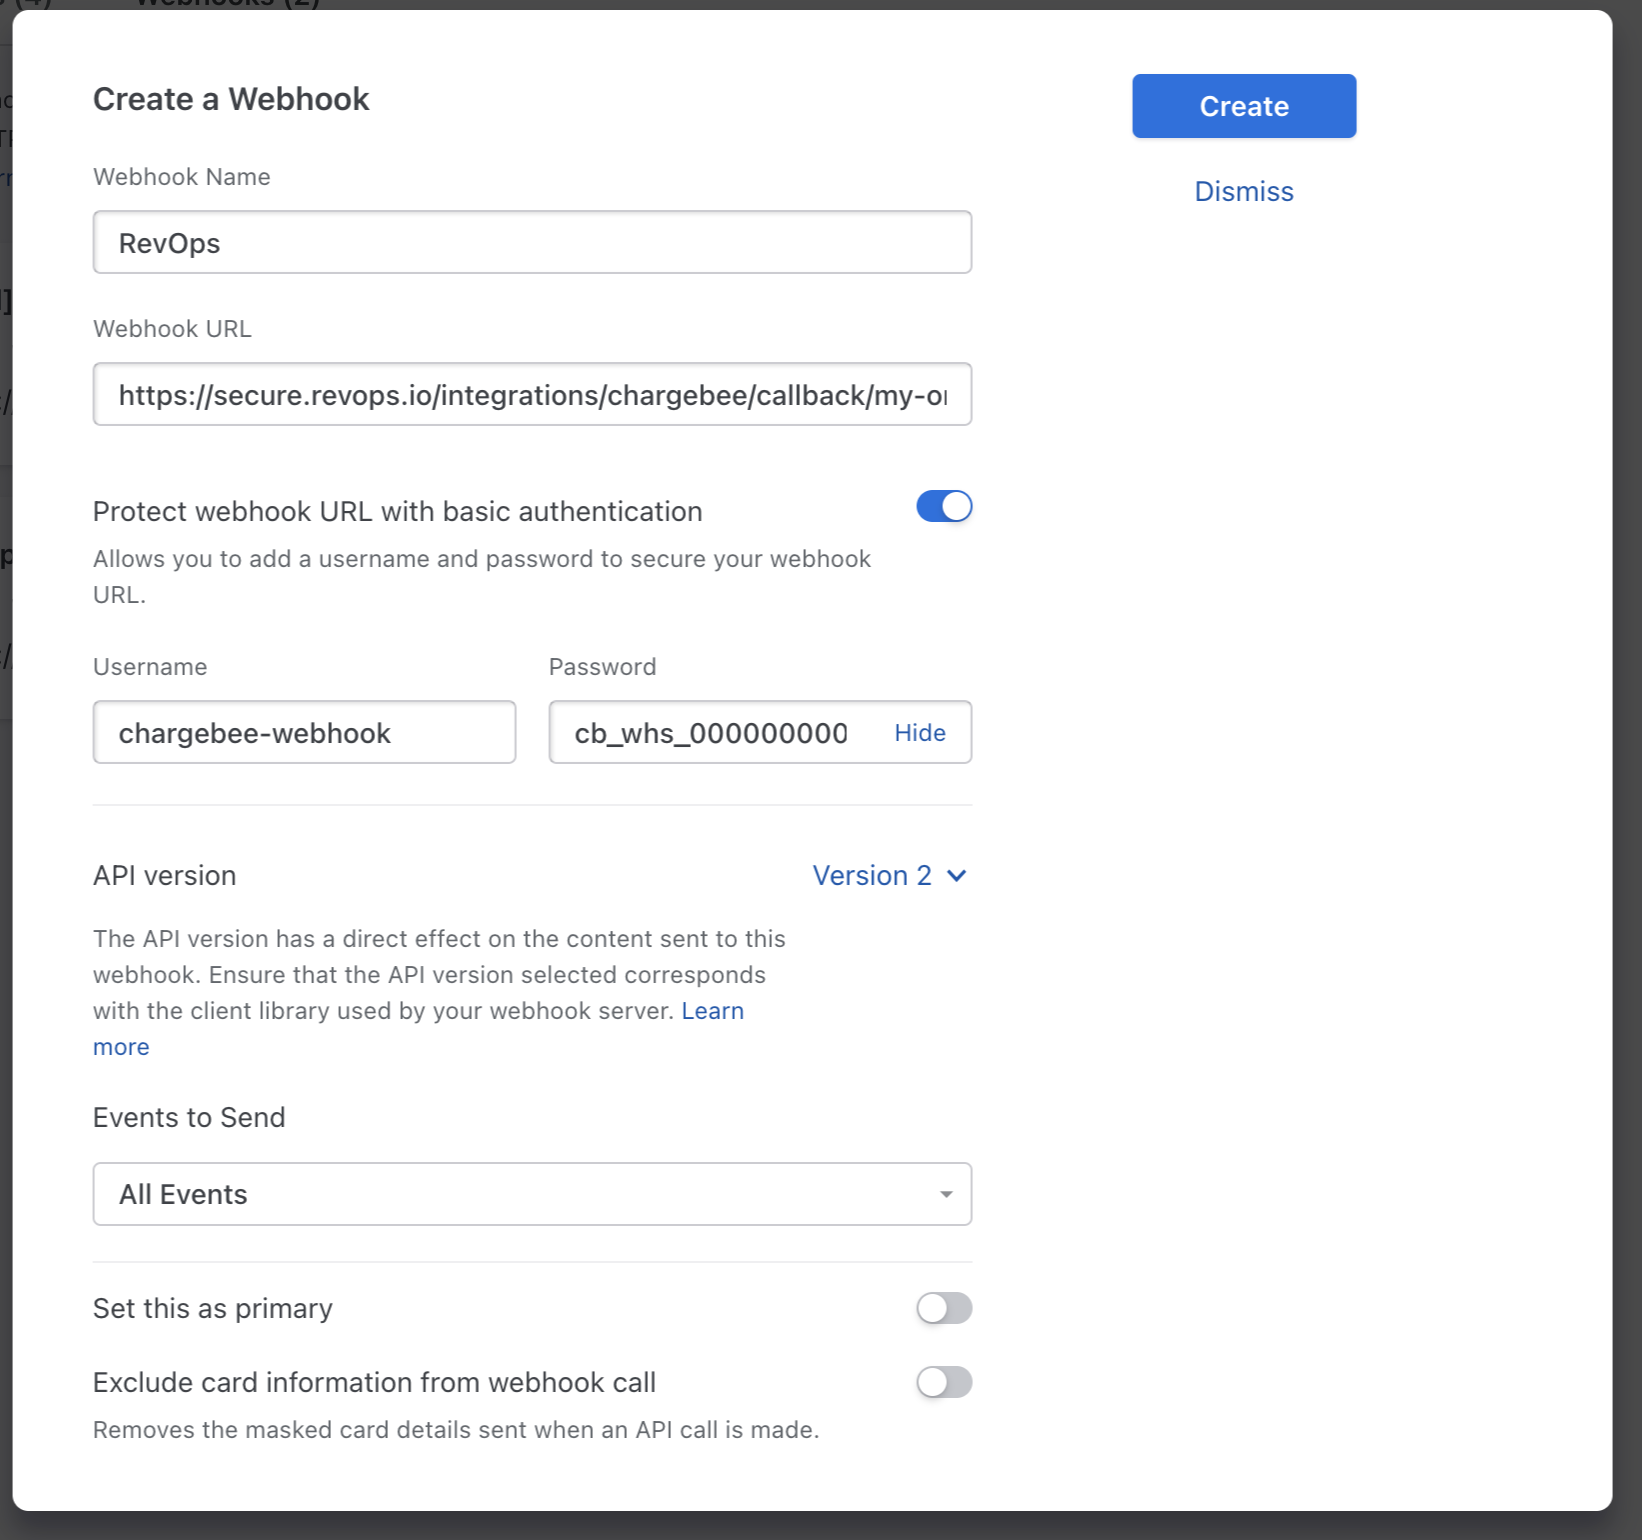 |
Once you have configured the webhook, you will want to send a test event. We recommend using the Payment Succeeded event, but any event will work.
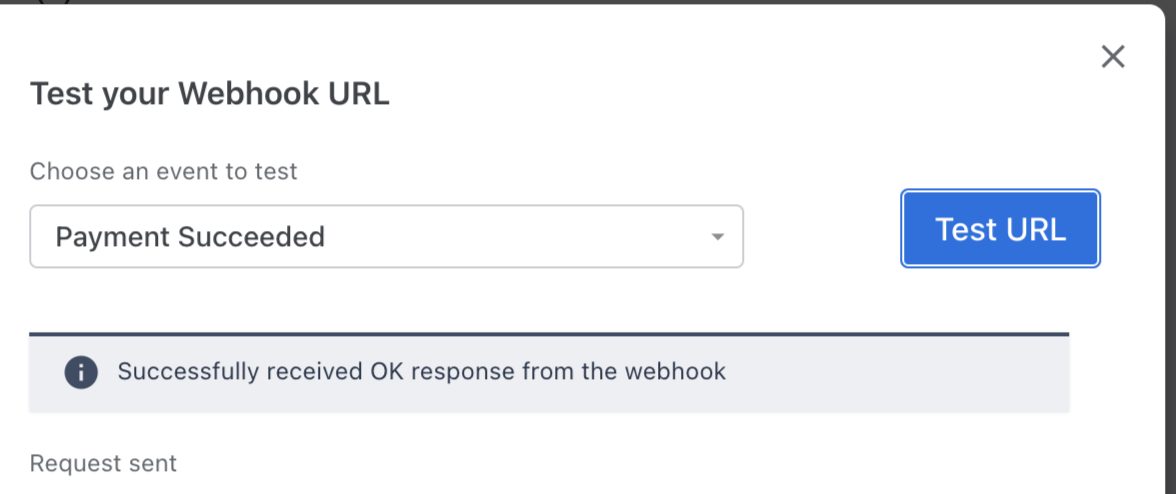
After sending the test, you should expect to see Successfully received OK response from the webhook. If you receive any other message, the webhook was not configured properly.
You can check that RevOps received the event properly by clicking the Refresh Webhook Status button under the configuration instructions. Instructions will no longer appear once the webhook configuration has been verified.
Common Errors
Below is a table of the most common errors and how to resolve them.
| Error Message | Explanation | Solution |
|---|---|---|
Received error code 404 from server | The webhook URL is incorrect. | Ensure that the value matches the configuration instructions. |
Received error code 405 from server | The webhook URL is incorrect. | Ensure that the value matches the configuration instructions. |
Received error code 401 from server | The provided credentials are incorrect. | Ensure basic authentication protection is enabled and the username and password match the configuration instructions. |
You can continue to monitor that RevOps is receiving webhook events by viewing the latest webhook logs. RevOps will show the last 10 processed events.
While RevOps subscribes to all webhook events, only a select subset are processed. Only the latest 10 processed webhooks will appear.
Your webhook configuration should continue to send all events as this list may change in the future.
Webhook logs automatically expire after 30 days. Logs will no longer be displayed after expiration.